Cosecha, secado, procesamiento y almacenamiento de semillas en climas cálidos y húmedos
Proporcionado por:
Índice
-
Introducción
-
Conceptos básicos sobre la cosecha de semillas
-
Condiciones óptimas para el almacenamiento y la longevidad de las semillas
-
Secado final de las semillas limpias y procesadas antes de su almacenamiento
-
Equipos para el procesamiento de semillas
-
Almacenamiento
-
Conclusión
-
Referencias
-
Recursos adicionales
Escrito por
Recursos relacionados
Resumen
La longevidad de las semillas se ve fuertemente influenciada por la temperatura y la humedad relativa, y su deterioro se acelera en climas cálidos y húmedos. Esta publicación presenta métodos prácticos y de bajo costo para que los agricultores a pequeña escala cosechen, sequen y almacenen semillas de hortalizas, hierbas y flores en condiciones tan difíciles. Describe enfoques específicos para cultivos de semillas húmedas y secas, haciendo hincapié en el momento adecuado de la cosecha, la limpieza y el procesamiento para lograr un contenido de humedad en las semillas de entre el 3 % y el 8 %. Entre las técnicas evaluadas se incluyen la fermentación para la limpieza de semillas de tomate, el secado primario y secundario, y el uso de desecantes de sílice o zeolita, deshidratadores de bajo costo y sistemas basados en el flujo de aire. Las estrategias de almacenamiento se presentan tomando como referencia la Regla del 100 de Harrington, lo que resalta el papel fundamental de la reducción de la humedad frente al control de la temperatura, y ofrece orientación sobre cuándo es beneficioso el enfriamiento o la congelación y cuándo es suficiente el almacenamiento a temperatura ambiente estable. Al aplicar estos métodos, los agricultores pueden proteger el vigor de las semillas, mantener la integridad genética y prolongar su vida útil, lo que garantiza un establecimiento más confiable de los cultivos a lo largo de las temporadas.
Introducción
Esta publicación está dirigida a los pequeños agricultores interesados en prácticas prácticas y eficaces de cosecha, secado y almacenamiento de semillas que prolonguen su vida útil y mantengan su calidad, y se refiere específicamente a semillas comunes de hortalizas, hierbas y flores cultivadas en granjas y jardines que se conservan bien en condiciones de almacenamiento.
Ya sea que las semillas se compren o se guarden, vale la pena protegerlas para evitar que se echen a perder. Lo ideal es un entorno de almacenamiento seco, oscuro, estable y fresco, pero los climas subtropicales son todo lo contrario: ¡húmedos, luminosos y calientes! En condiciones ideales de almacenamiento, muchas semillas de cultivos pueden durar varios años. En última instancia, la mejor práctica para preservar las semillas es sembrarlas y compartirlas regularmente, pero siempre habrá momentos en que los agricultores, especialmente aquellos que guardan sus propias semillas o almacenan grandes cantidades de semillas compradas, necesitarán opciones de almacenamiento. Esta publicación ofrece información práctica y soluciones económicas para que los agricultores protejan su recurso más preciado: ¡las semillas!
Es posible que algunos agricultores no puedan alcanzar las condiciones óptimas, y tal vez ni siquiera sean necesarias si las semillas se van a utilizar en un plazo breve. Adoptar prácticas adecuadas de almacenamiento es esencial para proteger el tiempo y el dinero invertidos en el cultivo y la cosecha de semillas destinadas a ser utilizadas durante varias temporadas. Cualquier esfuerzo por mejorar la calidad del almacenamiento contribuirá al vigor de las plántulas, incluso si el almacenamiento es solo por un período corto. Esta publicación aborda cómo y cuándo cosechar diversos tipos de semillas de cultivos, el secado primario de semillas a granel sin procesar, el secado secundario después de la limpieza de las semillas, los materiales y el equipo, y el almacenamiento.
Conceptos básicos sobre la cosecha de semillas
Las semillas se cosechan según cómo se encuentran en la planta. Algunos cultivos se cosechan con semillas húmedas y otros con semillas secas. Los cultivos de la categoría de semillas húmedas contienen semillas dentro de frutos carnosos que deben extraerse, lavarse y secarse. Los cultivos de la categoría de semillas secas contienen semillas secas dentro de vainas, o semillas “desnudas” totalmente expuestas, entre las que se incluyen muchas flores, hierbas y cultivos de granos como el sorgo y el maíz. Cada cultivo es único en cuanto a su momento óptimo de cosecha de semillas y a las técnicas especiales que funcionan mejor para la extracción, la trilla y el aventado. Los equipos sencillos de limpieza de semillas son útiles para procesar y limpiar las semillas, pueden ser muy económicos y es posible que ya estén disponibles en la granja. En esta publicación se describen los materiales y equipos necesarios.
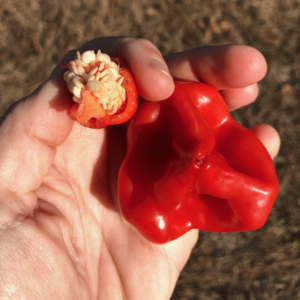
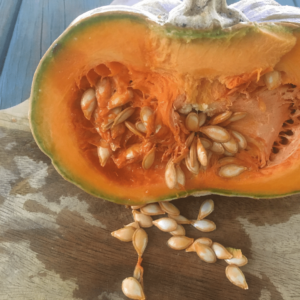
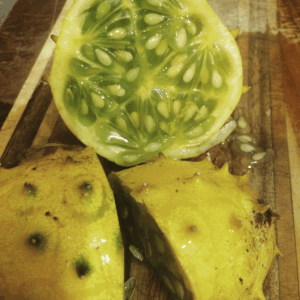
Cultivos como los jitomates, los chiles, las calabazas de invierno y los melones contienen semillas maduras cuando alcanzan su madurez comercial. Solo hay que separar las semillas de la fruta, lavarlas y secarlas. Foto: Melissa DeSa, Working Food
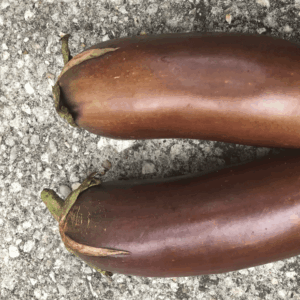
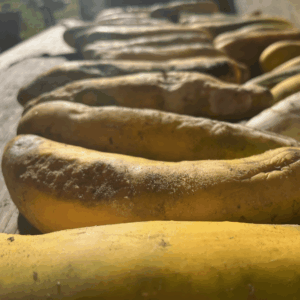
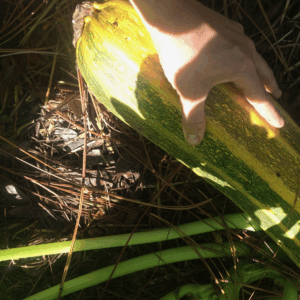
Los cultivos como la chile, el calabacín y el pepino no contienen semillas maduras en su interior cuando alcanzan la madurez comercial. Deben dejarse en la planta durante varios días o semanas más, mucho más allá de la etapa en que son comestibles. Crecen hasta alcanzar un tamaño mayor y adquieren un color amarillo-marrón, dependiendo del cultivo y la variedad. Foto: Melissa DeSa, Working Food
Cultivos de siembra en húmedo
Este grupo cuenta con semillas contenidas dentro de frutos carnosos e incluye cultivos como el tomate, el chile, la chile morrón y la mayoría de las cucurbitáceas, como la calabaza de invierno, la calabaza de verano, el pepino y el melón. La cáscara protectora del fruto los hace menos vulnerables al deterioro en comparación con los cultivos de semillas secas, pero el momento de la cosecha y la limpieza de las semillas siguen siendo importantes. Los agricultores cultivan muchos cultivos de semillas húmedas hasta la etapa de madurez total de las semillas, por lo que no se requiere trabajo adicional ni tiempo de cultivo, aparte del procesamiento de las semillas y cierta planificación previa a la siembra si existe preocupación por la polinización cruzada del cultivo. Las excepciones incluyen la chile, el pepino y el calabacín, que deben crecer durante un período más prolongado, ya que las semillas en el momento de la madurez comercial del cultivo están subdesarrolladas y no son viables. La madurez de las semillas se alcanza muchos días o semanas después, cuando el fruto ya no es comestible y ha superado la etapa en la que se cosecharía para su comercialización. Cada cultivo es único, y aprender a reconocer los indicadores de madurez de las semillas de cada uno será más fácil con el tiempo y la experiencia. Las pautas de la Tabla 1 ofrecen indicadores de madurez de las semillas y técnicas de procesamiento como punto de partida.
Tabla 1: Pautas para la cosecha de semillas de cultivos comunes de semillas húmedas.
| Fuente: Melissa DeSa, Working Food | ||
| CROP | MADUREZ DE MERCADO = MADUREZ DE LA SEMILLA | NOTAS DE LA COSECHA |
| Pepino | No | Deja madurar los pepinos unas 6 semanas más allá de su madurez comercial. Espera a que se desarrollen frutos más grandes y amarillentos. Si no estás seguro, corta uno para revisar las semillas. Si están firmes y bien desarrolladas, y se ven como semillas de pepino para plantar, están listas. Córtalas, saca las semillas y el jugo, y déjalas fermentar por un día o menos. Las semillas buenas se hundirán al fondo; a veces, las semillas buenas flotan en la superficie, así que no las descartes todas si se ven bien. Decanta, enjuaga y repite hasta que las semillas estén limpias, y luego colócalas a secar. No es necesario fermentarlas, y hacerlo por demasiado tiempo puede dañar las semillas. |
| Berenjena | No | Deja madurar unas 4 o 5 semanas más allá de la madurez comercial de las chiles. Espera a que se desarrollen frutos más grandes, de color marrón o amarillo. Los frutos cosechados pueden dejarse unos días más antes de procesarlos, pero no esperes más, ya que podrían pudrirse. Ábrelos y extrae las semillas. Las grandes cantidades pueden resultar frustrantes porque las semillas están muy incrustadas en la abundante pulpa. Córtalas en muchos trozos pequeños y exprímelas o machácalas repetidamente con agua hasta que las semillas se suelten y puedan separarse de la pulpa con un colador o una malla. Un procesador de alimentos con una cuchilla de plástico para masa y un poco de agua adicional ayuda a desmenuzar los trozos y separar las semillas. Separa las semillas de la pulpa con un colador, enjuágalas y repite el proceso hasta que las semillas estén limpias, y luego colócalas a secar. |
| Melones | Sí | Los melones y las sandías completamente maduros y comestibles contienen semillas maduras. Solo hay que rasparlas, enjuagarlas muy bien y secarlas. No es necesario dejarlas fermentar, pero si lo haces, puede ser útil para limpiar bien las semillas y eliminar el material placentario. Sin embargo, no debes dejarlas fermentar por mucho tiempo (24 horas o menos); de lo contrario, la germinación podría verse afectada y las semillas podrían dañarse. Al igual que con los pepinos, es probable que las semillas buenas se hundan, pero a veces también flotan, así que revísalas con cuidado antes de escurrirlas. |
| Chiles | Sí | Los chiles que han alcanzado su madurez total y están listos para consumirse contienen semillas viables, pero nunca cuando aún están verdes e inmaduros. Deja que se desarrollen por completo hasta que alcancen su color definitivo. Simplemente ábrelos, raspa el interior, enjuágalos y sécalos. Si alguna cavidad de semillas tiene moho, aunque el exterior se vea en perfecto estado, no es recomendable guardar esas semillas. |
| Squash, Verano |
No | Dejen madurar las calabazas de verano unas 6 a 8 semanas más de lo que se suele hacer para su venta. Esperen a que los frutos alcancen un tamaño muy grande y tengan una cáscara dura, y que hayan cambiado de color respecto a cuando eran frutos comestibles pero aún inmaduros. Mantenerlos almacenados durante unos 20 días después de la cosecha puede ayudar a mejorar la calidad de las semillas. Simplemente raspen el interior, enjuaguen, separen las semillas de la pulpa con una malla de ¼ de pulgada y rocíen con agua a alta presión. No es necesario dejarlas fermentar. |
| Calabaza, Invierno |
Sí | Las calabazas de invierno que han alcanzado la madurez total y están listas para el consumo contienen semillas viables. Lo ideal es cosecharlas cuando los tallos se vuelven marrones y la cáscara se endurece, de modo que no se marque al presionarla con la uña. Un secado y almacenamiento adecuados mejoran la calidad de la pulpa y de las semillas. Basta con rasparlas, enjuagarlas, separar las semillas de la pulpa con una malla metálica de ¼ de pulgada y rociarlas con agua a alta presión. No es necesario dejarlas fermentar. |
| Tomates | Sí | Los tomates completamente maduros y comestibles contienen semillas viables. Exprime los tomates y vierte su jugo en un frasco; déjalos fermentar durante 1 a 2 días hasta que se forme moho y las semillas se hundan al fondo. Decanta y enjuaga varias veces hasta que estén limpias, cuélalas y sécalas. Como desprenderán un olor fuerte, se recomienda cubrirlos con un paño para reducir los olores y evitar las moscas de la fruta. |
Los agricultores que guarden sus propias semillas deberán procesarlas y secarlas lo más rápido posible. Una vez extraídas las semillas húmedas del fruto, deben enjuagarse y lavarse con agua fría lo mejor posible para separarlas del material que las rodea. Colócalas en una sola capa sobre servilletas de tela o toallas, una malla fina, platos de papel o filtros de café. El papel común, el papel de periódico y las toallas de papel se pegan a las semillas, por lo que no se recomienda usarlos. Todos los días, revuelve las semillas para separarlas del material mientras se secan y evitar que se peguen. Los tomates se pueden frotar suavemente entre los dedos o las palmas de las manos para separar las semillas.
Fermentación de semillas de tomate antes de secarlas
El tomate es un cultivo cuyas semillas deben fermentarse como parte del proceso de limpieza. Este proceso elimina el saco gelatinoso que rodea cada semilla, el cual contiene inhibidores de la germinación, y da como resultado una semilla limpia y en buen estado. Se ha sugerido que la fermentación también reduce las enfermedades, pero las enfermedades afectadas son limitadas y el proceso debe realizarse a una temperatura y durante un tiempo específicos para que sea efectivo. Por lo tanto, no se debe depender de la fermentación como medio para destruir patógenos (Navazio, 2012).
Para fermentar, deja reposar el recipiente con el puré de tomate obtenido al exprimir o machacar los frutos, cubriéndolo con un paño para reducir los olores y ahuyentar a las moscas de la fruta. La mezcla se puede agitar diariamente, aunque algunos conservadores de semillas prefieren no hacerlo para poder observar el estado de fermentación al examinar la capa superior de película. A veces, las semillas quedan atrapadas en la capa superior del material, y al mezclarlo pueden desplazarse hacia el fondo.
Las temperaturas ideales oscilan entre los 70 °F y los 85 °F (Buttala y Siegel, 2015), y el proceso debería completarse en menos de tres días. Si las condiciones son de calor y humedad, un tiempo de tres días o más podría dañar la semilla. Las semillas buenas, una vez separadas de su saco gelatinoso, se hundirán hasta el fondo, mientras que las semillas no viables y los sacos flotarán en la superficie. Cuando esto ocurra y aparezca moho, se puede decantar la mezcla y repetir el proceso varias veces hasta obtener agua limpia y semillas limpias. Cuele las semillas limpias con un colador fino o un tamiz, y luego colóquelas en una sola capa para que se sequen sobre tela, mallas o filtros de café.
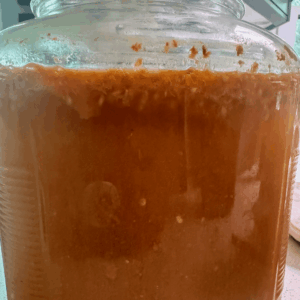
- 1 – El puré de tomate que se deja reposar comienza a fermentar de forma natural
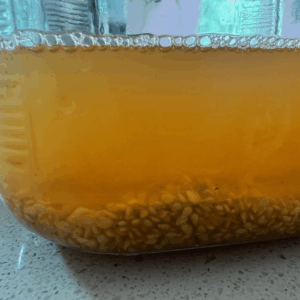
- 2 – Después de 24 a 48 horas, se escurren las semillas y se enjuagan varias veces; las semillas buenas se hunden hasta el fondo.
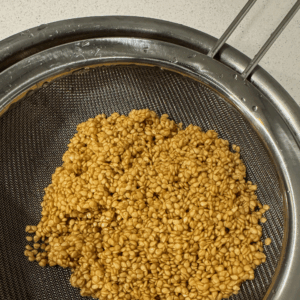
- 3 – Se cuelan las semillas y se enjuagan una vez más en un colador.
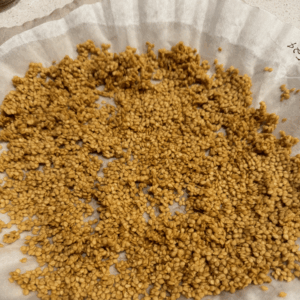
- 4 – Semillas que se dejan secar en una capa delgada sobre un filtro de café.
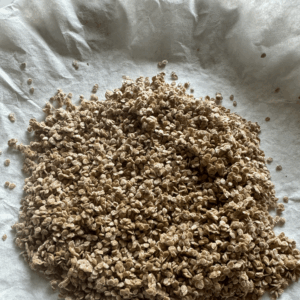
- 5 – Mueve las semillas sobre el filtro, frotándolas entre los dedos y separándolas más a medida que se van secando por completo. Fotos: Melissa DeSa, Working Food.
Cultivos de siembra en seco
Este grupo de semillas incluye cultivos como las leguminosas (guisantes, frijoles, caupí, etc.), las brassicas (col rizada, col de hoja ancha, mostaza, verduras asiáticas, etc.), el amaranto, el okra, la lechuga, las flores, las hierbas aromáticas y las cucurbitáceas secas, como las calabazas y la luffa. Estos cultivos requieren más tiempo para desarrollar semillas completamente maduras, lo cual ocurre mucho después de la etapa de madurez comestible para el mercado. Esto representa una limitación importante en algunos sistemas agrícolas. Una hoja verde puede tardar entre 40 y 60 días en estar lista para la cosecha comercial, pero entre 120 y 180 días para la cosecha de semillas. Otra consideración es que se necesita un mayor espaciamiento para las bráscicas y las lechugas, que crecen considerablemente más a medida que alcanzan la madurez completa (en comparación con su tamaño de cosecha comercial), a fin de aumentar la circulación de aire. El uso de tutores las mantiene erguidas y separadas del suelo, protegiendo las semillas de la pudrición y de que sean pisoteadas. Algunos cultivos pueden ser autosuficientes y no necesitar tutores; puedes esperar a ver qué pasa o ser proactivo e instalar un sistema de soporte sencillo antes de que las plantas se vuelvan tan grandes y difíciles de manejar que resulte complicado sostenerlas en etapas avanzadas del proceso de crecimiento.
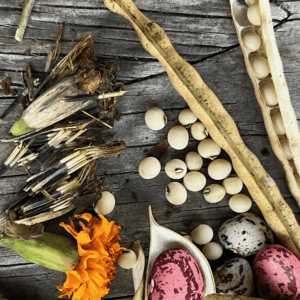
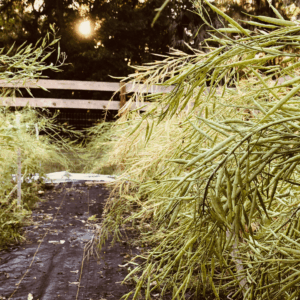
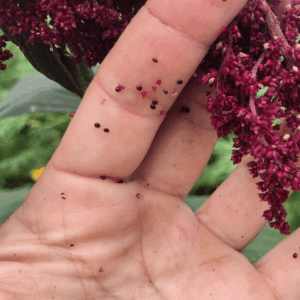
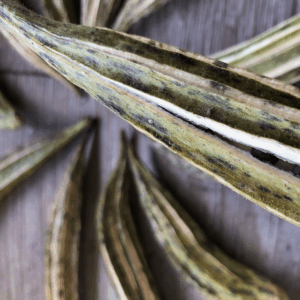
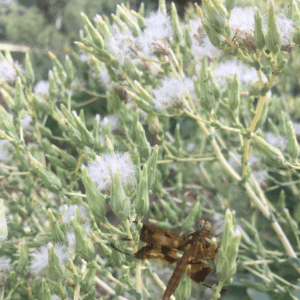
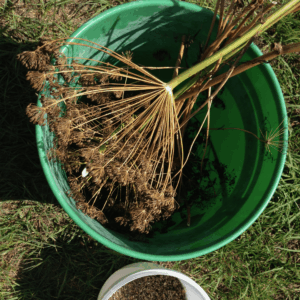
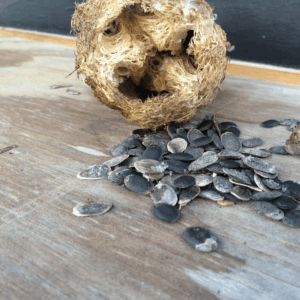
Algunos ejemplos de cultivos de semillas secas son: leguminosas como el chichí y el frijol mantequilla Dixie, flores de caléndula, brassicas como la mostaza asiática Maruba Santo, amaranto, okra, lechuga, eneldo y luffa. Fotos: Melissa DeSa, Working Food
Este tiempo adicional requiere un manejo continuo de los cultivos, y pasar más tiempo en el campo puede aumentar el riesgo de plagas y enfermedades. Además, es tiempo que podría dedicarse a otro cultivo de mayor valor. Por lo tanto, habrá que considerar las ventajas y desventajas según la situación de tu granja.
-
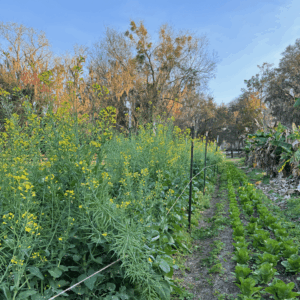
- La col rizada etíope (Brassica carinata) se cosecha para la venta a los 50 días, pero puede tardar hasta 120 días en alcanzar la madurez de las semillas. No solo se requiere más tiempo, sino que cada planta crece mucho más y puede ser necesario colocarle tutores para mantener erguidos los tallos florales altos, así como realizar algunas tareas de manejo para aclarar las plantas y aumentar la circulación de aire. Es posible que aparezcan plagas como los pulgones y los escarabajos pulga, por lo que será necesario controlarlas. Foto: Melissa DeSa, Working Food
-
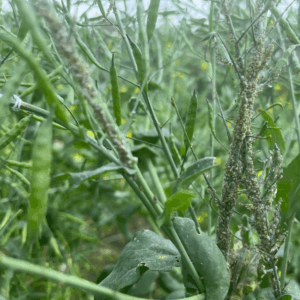
- Si las vainas de las brassicas permanecen más tiempo en el campo, puede producirse una plaga de pulgones, a quienes parece encantarles las vainas jóvenes. Los pulgones se multiplican rápidamente y los daños que causan al alimentarse pueden deformar las vainas y, posiblemente, introducir enfermedades. Será necesario controlarlos. A menudo aparecen mariquitas, como se ve aquí, junto con su etapa larvaria, que es más depredadora. Foto: Melissa DeSa, Working Food
-
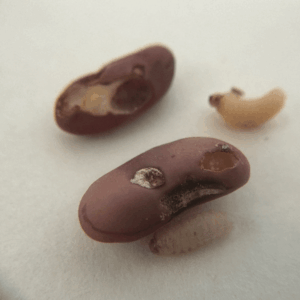
- Los gorgojos pueden arrasar un cultivo de Vigna, como el frijol carito y la judía larga. Las prácticas de cosecha y almacenamiento pueden ayudar a mitigar el problema. Foto: Melissa DeSa, Working Food
-
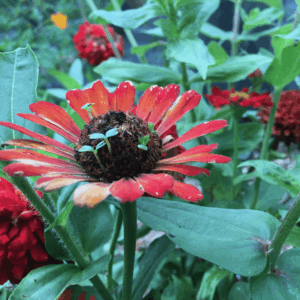
- Si no se cosechan las semillas a tiempo, y si se producen períodos prolongados e inevitables de lluvia, esto puede provocar la pérdida de semillas. ¡Las zinnias que están casi en su plena madurez y que se exponen a humedad constante pueden germinar directamente en la planta! Foto: Melissa DeSa, Working Food
Al igual que con toda cosecha de semillas, los indicadores de madurez varían según el cultivo y la variedad, y la mejor forma de conocerlos es a través de la experiencia con el cultivo. Las pautas de la Tabla 2 ofrecen indicadores de madurez de las semillas y técnicas de procesamiento como punto de partida. Muchos cultivos que son fáciles de cultivar para el mercado resultan complicados a la hora de producir semillas. Tardan más en madurar y son mucho más vulnerables a las pérdidas debido a la alta humedad y la humedad ambiental. Por ejemplo, el caupí (Vigna unguiculata) es un cultivo común en el sureste, ya sea para obtener frijoles frescos o como cultivo de cobertura. Es posible obtener semillas maduras y secas, pero el momento en que el cultivo entra en su etapa final de desarrollo de las semillas es vulnerable a la alta humedad y la cosecha de semillas puede echarse a perder fácilmente. Si además coincide con la presencia del molesto gorgojo del frijol de vaca, se puede perder una parte significativa de la cosecha de semillas, especialmente si no se cosecha de inmediato y se seca rápidamente. Los agricultores deben determinar el mejor momento según sus condiciones locales de cultivo.
Tabla 2: Pautas para la cosecha de semillas de cultivos comunes de semillas secas.
| Fuente: Melissa DeSa, Working Food | ||
| CROP | MADUREZ DE MERCADO = MADUREZ DE LA SEMILLA | NOTAS DE LA COSECHA |
| Amaranto | Depende: semillas secas, si se utilizan como alimento en algunas variedades, frente a las hojas | Las pequeñas estructuras florales contienen una gran cantidad de semillas diminutas. A medida que las flores se marchitan y mueren, comenzando por la parte inferior, las semillas se pueden cosechar a mano frotándolas enérgicamente contra un cubeta. O bien, cuando las flores estén ⅔ maduras, corta toda la cabeza floral y sécala en el interior. Ten cuidado con la posibilidad de que se conviertan en maleza, ya que las semillas abundantes tienden a caer al suelo. |
| Brásicas | No | Las vainas se forman en tallos altos después de la floración, madurando de abajo hacia arriba y de manera escalonada, al mismo tiempo que la floración y la producción de vainas. Las semillas se desmoronan fácilmente en el campo si se cosechan cuando están muy secas, pero cosecharlas demasiado pronto dará como resultado semillas inmaduras. La cosecha oportuna es fundamental para encontrar el estado perfecto, cuando las vainas tienen un color amarillo-marrón claro. Los tallos completos cercanos a la madurez final se pueden cosechar y secar en interiores, incluso si las primeras vainas de la parte superior aún están verdes e inmaduras. Rara vez madurarán todas de manera uniforme, por lo que es mejor conservar la mayoría de las semillas buenas y descartar las más pequeñas y jóvenes. |
| Maíz y sorgo | Depende: Las semillas secas pueden consumirse como alimento en algunas variedades | Las semillas están listas cuando están completamente secas; los indicadores varían según la variedad. Las barbas de la mazorca se vuelven marrones y, en algunas variedades, la mazorca se inclina y cuelga; las hojas se vuelven marrones y las semillas están duras. Si se cosechan temprano para evitar la humedad, deshoje inmediatamente y seque en interior. Cuando la semilla esté lo suficientemente dura, sepárela de la mazorca. La madurez del sorgo varía mucho según la variedad, pero es mejor cosecharlo cuando las semillas están secas y no se abollan al presionarlas con la uña, aproximadamente 50 días después de la polinización. Las panículas sueltas y abiertas se secan más fácilmente en el campo en comparación con las más densas. |
| Flores y hierbas | No | Las semillas quedan muy expuestas al carecer de vainas protectoras o estructuras frutales, por lo que deben cosecharse en el momento oportuno. Es difícil generalizar debido a la gran diversidad existente, pero las flores ornamentales de jardín producen semillas en el disco central una vez que las flores se marchitan. Las hierbas pueden tener semillas pequeñas dentro de cáscaras parecidas al papel, o semillas expuestas. Es importante vigilar cuidadosamente la madurez de las semillas y las condiciones climáticas, y cosechar los tallos o las plantas enteras con anticipación si es necesario para secarlas en interiores. Lo ideal es cosechar a mano directamente de la planta en condiciones secas, pero esto no siempre es posible. |
| Legumbres | Depende: Se pueden usar frijoles o chicharrones secos como alimento. | Las vainas verdes frescas cambian de color y textura según la variedad, adquiriendo un tono amarillento, caoba o piel de ante. Cuando están completamente secas, se pueden cosechar a mano directamente de la planta. Si se va a manejar un gran volumen de semillas, corta las plantas a nivel del suelo y llévalas al interior para que se sequen cuando ⅔ estén listas, con semillas maduras o casi maduras. |
| Lechuga | No | Las abundantes semillas pequeñas, unidas a estructuras plumosas parecidas a paracaídas (pappus), pueden dispersarse fácilmente con el viento si no se cosechan a tiempo. Cuando se encuentran en aproximadamente ⅔ de su etapa plumosa, se puede cosechar todo el tallo y secarlo posteriormente en el interior. Si solo se cosecha lo suficiente para uso en la granja, la cosecha manual directamente de la planta a medida que estén listas puede ser suficiente, ya que cada planta de lechuga produce muchas semillas. La madurez de las semillas es indeterminada, por lo que siempre existe la posibilidad de perder parte de la cosecha de semillas. Los tallos contienen una savia lechosa que es pegajosa y puede irritar la piel. |
| Okra | No | Las vainas se agrandan, se vuelven amarillas o de color canela y se secan hasta parecerse casi a la madera a medida que las semillas maduran. Algunas variedades se abren por las costuras, lo que indica que están listas aunque no estén completamente secas. La vaina grande protege muy bien a las semillas que contiene, y estas rara vez se caen o se enmohecen, por lo que hay tiempo de sobra; sin embargo, si se dejan demasiado tiempo, se enmohecerán y se echarán a perder. Córtalas de la planta y llévalas al interior para que se sequen. |
Dado que los cultivos de semillas secas son más vulnerables a la humedad ambiental, los agricultores deben actuar con anticipación en el momento de la cosecha para adelantarse a las inclemencias del clima y evitar la pérdida de semillas que pueden romperse, dispersarse o ser arrastradas por el viento con facilidad. Las semillas contenidas en las vainas son mucho más fáciles de descascarar si están completamente secas. Si las condiciones ambientales durante la cosecha no son propicias para el secado, deben llevarse a un lugar cubierto para que se sequen por completo. Una vez que se retiran las semillas de sus vainas, se puede utilizar un sencillo proceso de avellado con ventiladores o con el viento y tamizado con rejillas para separar más paja de las semillas. Es importante eliminar las vainas, las cáscaras y la paja lo antes posible, ya que pueden albergar huevos de insectos, patógenos y humedad. En climas cálidos y húmedos, las semillas no deben secarse al sol cuando las temperaturas superan los 95°F (McCormack, 2004). En su lugar, lo ideal es un espacio con clima controlado o uno que cuente con ventiladores y buena circulación de aire. Las semillas deben procesarse, limpiarse y secarse lo más rápido posible para reducir la incidencia de humedad, moho, crecimiento de insectos y otros efectos indeseables en la calidad de las semillas.
Los tipos de cultivos y semillas influyen en la tolerancia al almacenamiento
No todos los cultivos tienen la misma tolerancia a la desecación y al almacenamiento. Por ejemplo, las semillas de algunas frutas tropicales, como el mango, el aguacate y la jaca, no toleran la desecación ni el almacenamiento y morirán si no se siembran de inmediato. En su entorno natural de crecimiento, es más ventajoso para la semilla germinar inmediatamente después de caer al suelo; de lo contrario, corre el riesgo de ser devorada por depredadores o de descomponerse. Las variedades típicas de cultivos agrícolas y de huerto suelen ser más resistentes a la desecación y están adaptadas para el almacenamiento; sin embargo, su vida útil varía según factores como el grosor de la cubierta de la semilla y el contenido de aceite.
Condiciones óptimas para el almacenamiento y la longevidad de las semillas
Las semillas son plantas vivas y deben tratarse con cuidado para preservar su longevidad y calidad. Aunque se encuentran en un estado semidormido, las semillas responden a los estímulos ambientales que favorecen el crecimiento, como el calor, la luz y la humedad. Para que las semillas permanezcan en estado de dormancia, es necesario eliminar estos estímulos y sustituirlos por condiciones frescas, oscuras, secas y estables. De todas ellas, la más crítica y difícil de lograr en climas cálidos y húmedos es la sequedad. Dependiendo de la estación, las condiciones ambientales oscilan entre el 50 % y el 100 % de humedad relativa a lo largo del año. Lo ideal es que las semillas se almacenen en condiciones con una humedad relativa de 35 % o menos. Existen opciones sencillas y económicas para lograrlo, incluso en climas húmedos.
La humedad es el principal enemigo de la vida útil de las semillas.
La vida útil de una semilla se reduce aproximadamente a la mitad por cada 1 % de aumento en su contenido de humedad.
Cómo la temperatura y el contenido de humedad de las semillas influyen en las condiciones de almacenamiento. Fuente: drychain.org
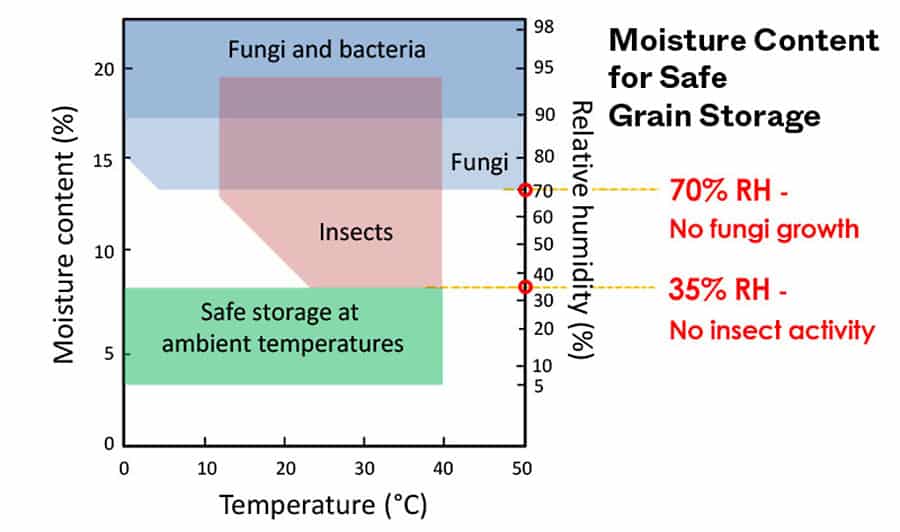
Los productores suelen suponer que se necesitan condiciones de frío para el almacenamiento de semillas. Si bien esto sin duda ayuda a prolongar la vida útil de una semilla, el almacenamiento en frío no es tan importante como el contenido de humedad, y no se debe recurrir a él si las semillas no están completamente secas. Los refrigeradores domésticos y las cámaras frigoríficas suelen tener un alto nivel de humedad y, por lo tanto, no son ideales para el almacenamiento. Por ejemplo, una cámara frigorífica para el almacenamiento de alimentos suele mantener una humedad relativa del 95 %, mientras que el congelador oscila entre el 80 % y el 90 % de humedad relativa. Con el uso frecuente (entrada y salida de personas, puertas que se abren y se cierran, ciclos de descongelación, etc.), las condiciones cambian constantemente, lo cual también es perjudicial para la calidad de las semillas. Es preferible mantener condiciones estables para las semillas completamente secas en un recipiente hermético a temperatura ambiente en el interior de una habitación. Un cajón de escritorio, un armario u otro espacio en el hogar o la oficina será suficiente. No es necesario refrigerar ni congelar, especialmente si el objetivo es un almacenamiento a corto plazo (es decir, de meses a unos pocos años).
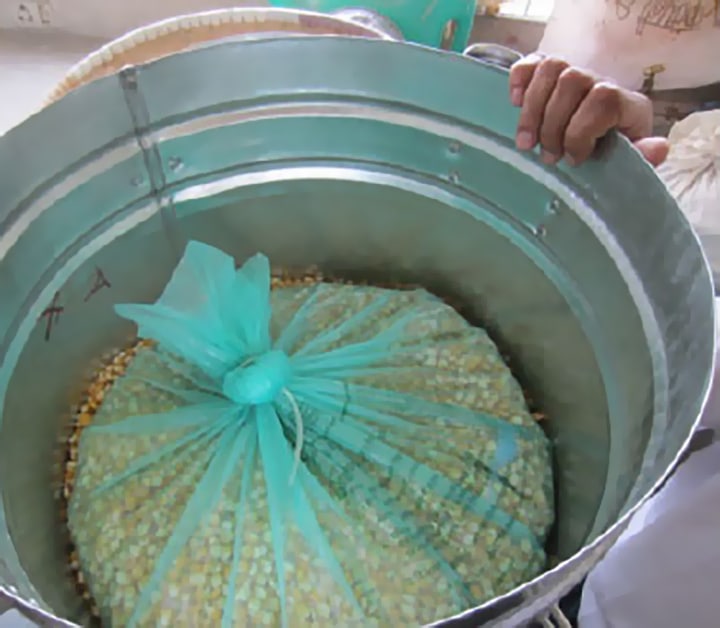
El bajo contenido de humedad en las semillas no solo es más económico y eficiente desde el punto de vista energético que el almacenamiento en frío,
, sino que también es más eficaz en cuanto a la longevidad de las semillas.
Fuente: drychain.org
Secado final de las semillas limpias y procesadas antes de su almacenamiento
Una vez que las semillas se han extraído de sus frutos y vainas y se ha completado el proceso básico de aventado o limpieza, es posible que aún necesiten un secado adicional antes de almacenarlas. El volumen de semillas, el tipo de cultivo y los recursos disponibles determinarán la técnica que se utilice. A continuación se presentan algunas herramientas y materiales prácticos y accesibles para el secado de semillas con tecnología sencilla a escala pequeña o mediana.
Perlas desecantes
Las perlas de sílice o las perlas cerámicas de zeolita, como las Drying Beads®, son excelentes para eliminar la humedad de las semillas y pueden reutilizarse muchas veces. Las perlas de sílice cambian de color, lo que indica cuándo están completamente secas. Las perlas de zeolita, sin embargo, no cambian de color a medida que varía su capacidad de saturación, por lo que saber cuándo renovarlas es más complicado en comparación con las de sílice. Ambos tipos de perlas funcionan bien para eliminar la humedad de las semillas sin generar calor. Se estima que las perlas de zeolita pueden regenerarse al menos 10,000 veces (USAID), mientras que la sílice pierde capacidad de retención de agua con cada ciclo de regeneración. Cualquiera de las dos opciones funcionará para la mayoría de los productores a pequeña escala y recolectores de semillas. Las perlas de zeolita también son seguras para el almacenamiento de alimentos, por lo que cualquier fruta seca o hierba procesada en la finca, o para uso personal, puede beneficiarse de estas perlas.
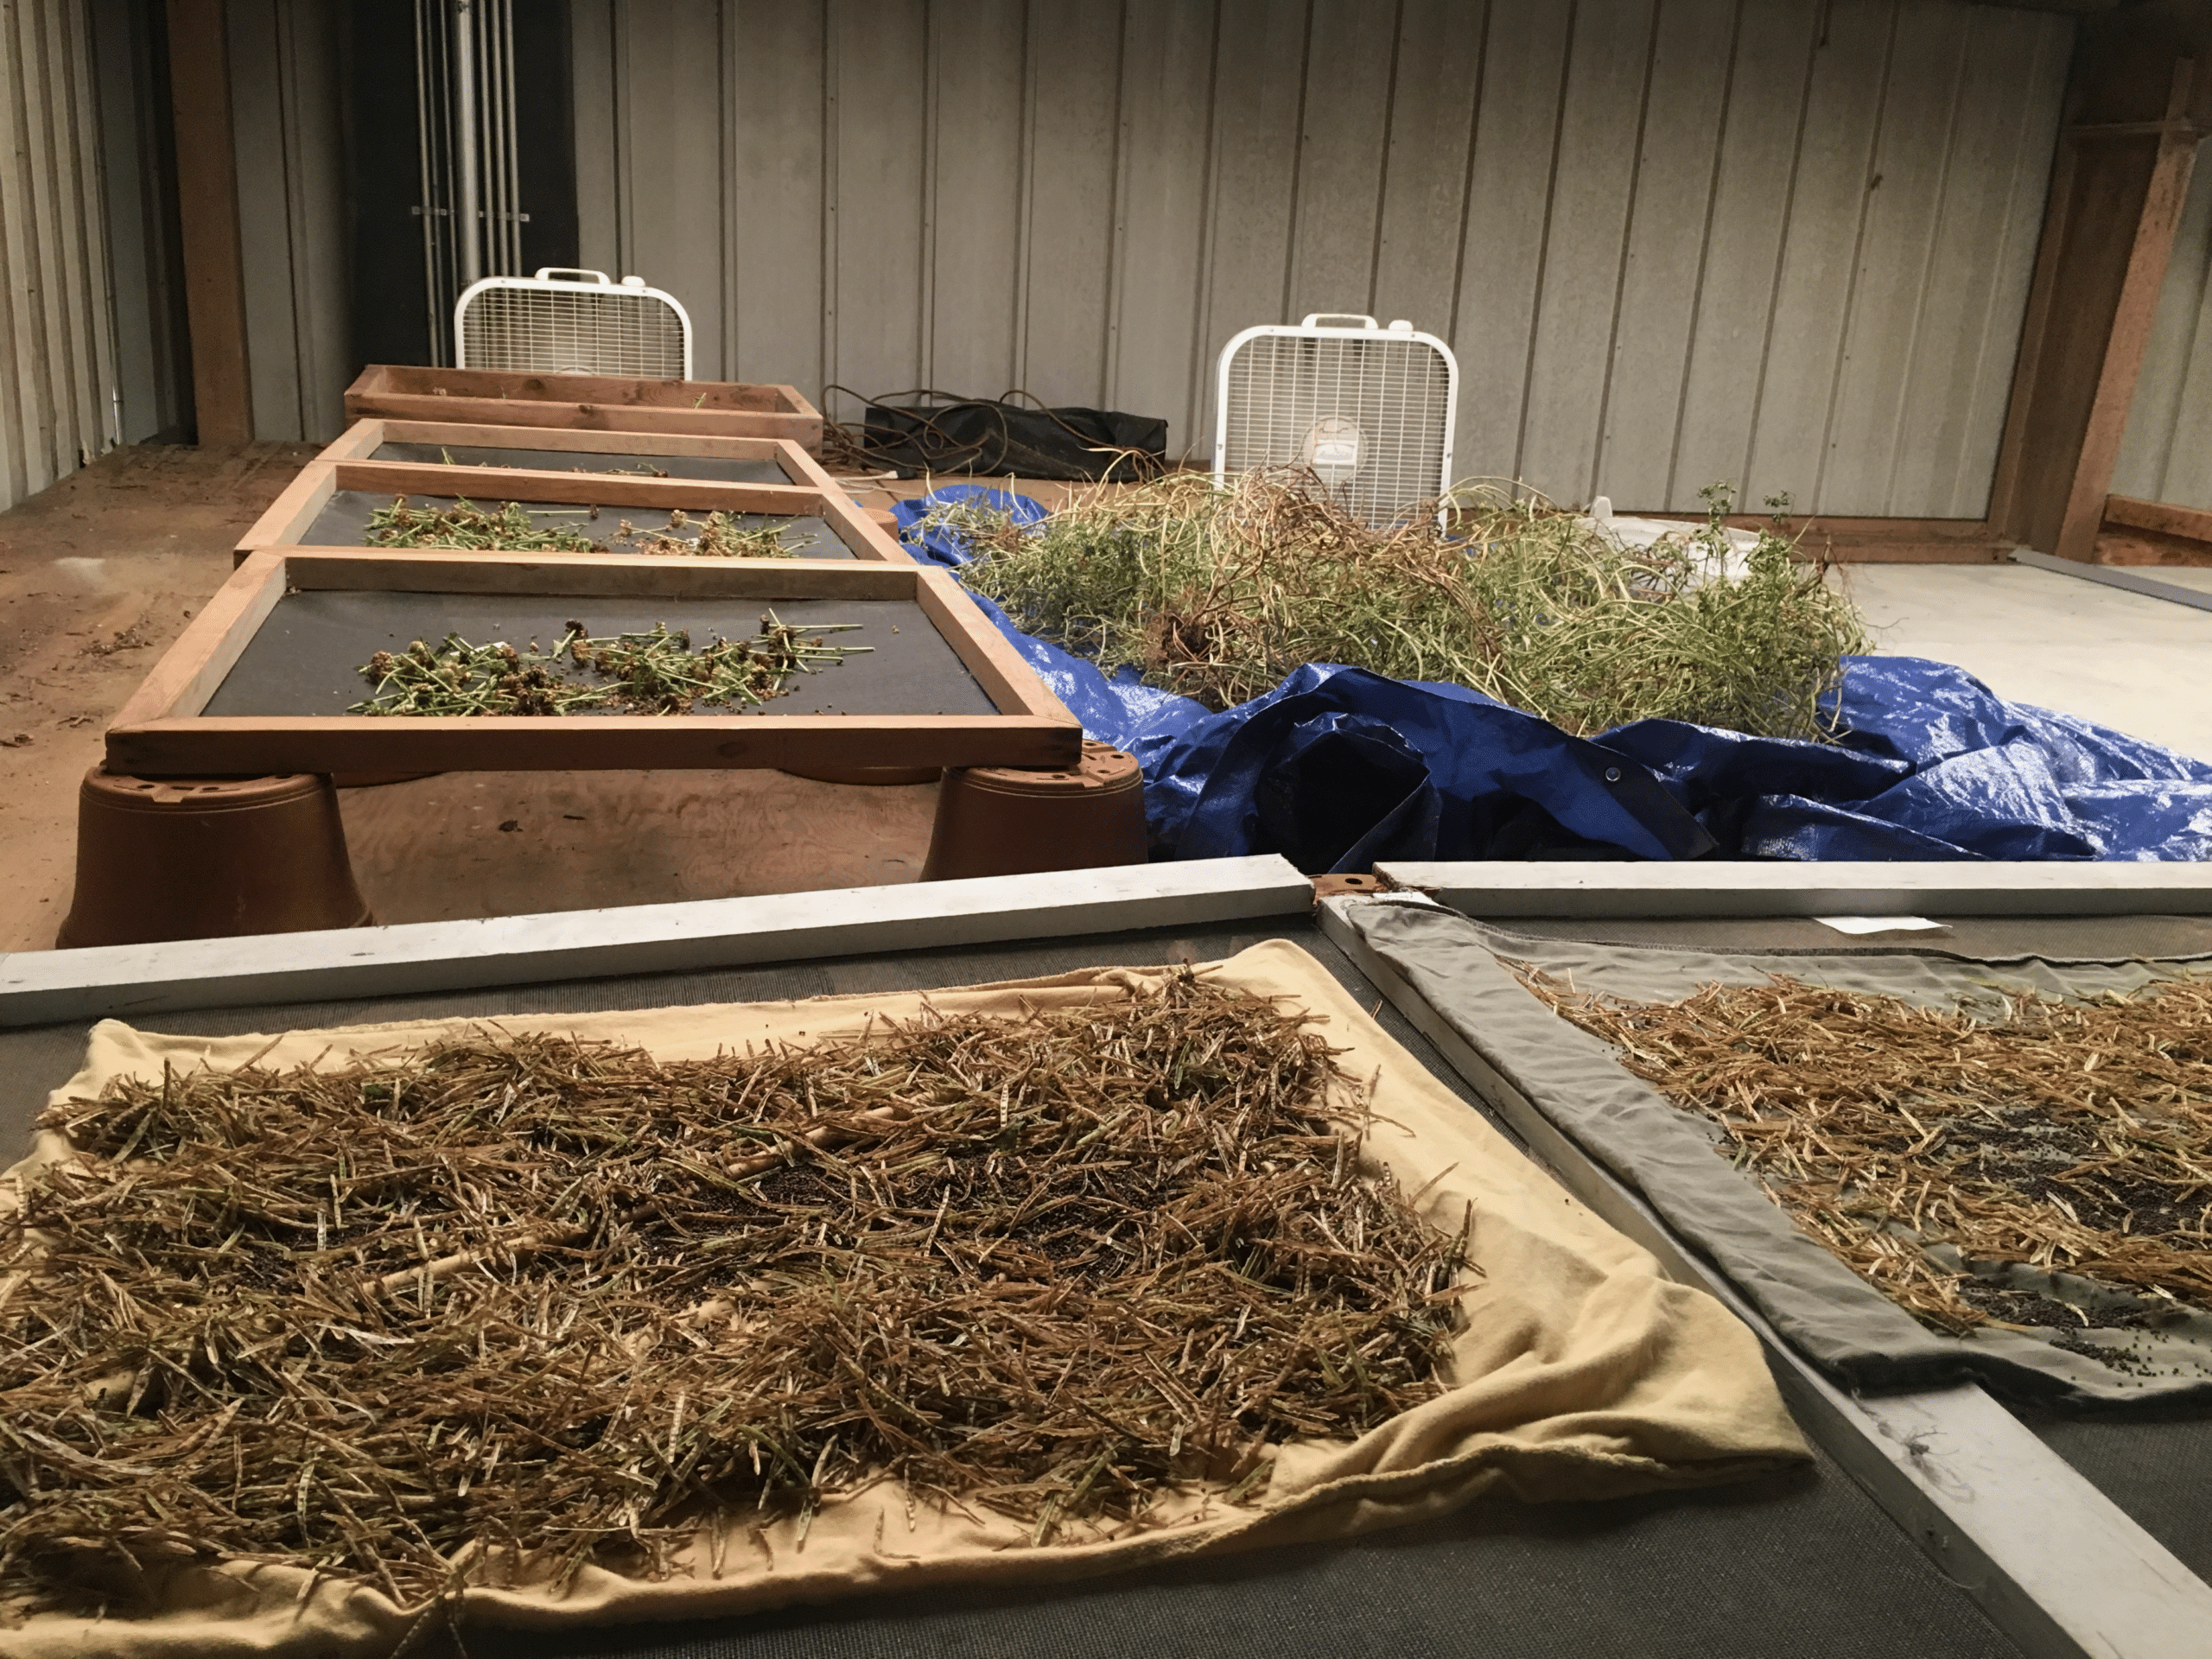
Las rejillas con fondo de malla permiten que el material de siembra a granel se extienda y se seque. Los ventiladores de caja aumentan el flujo de aire y ayudan al secado. Foto: Melissa DeSa, Working Food
El contenido de aceite de las semillas, la temperatura y la capacidad inicial de absorción de humedad influyen en la cantidad de perlas necesarias para secar las semillas. Lo mejor es utilizar una proporción de perlas respecto a semillas de 0,5:1 a 1:1. Una vez agregadas las perlas, controle el contenido de humedad utilizando estimaciones de la humedad relativa del aire con un higrómetro económico y/o una cinta indicadora de humedad. Cuando se alcancen niveles suficientes de humedad en las semillas, retire las perlas y selle el recipiente. Es posible que debas recargar las perlas si las semillas necesitan secarse más y la humedad relativa medida dentro del recipiente no cambia (Osmani, 2023). Cuanto más baja sea la humedad relativa, mejor; sin embargo, una recomendación general es almacenar las semillas de cultivos a menos del 35 % de humedad. La Tabla 3 ofrece pautas sobre el contenido de humedad de las semillas de cultivos con base en la humedad relativa medida en condiciones de almacenamiento.
Deshidratadores
Los deshidratadores de alimentos de uso doméstico pueden utilizarse para secar semillas más grandes. Como regla general, las semillas no deben exponerse a temperaturas superiores a 100 °F para evitar dañar el embrión vivo (Motis, 2010). Detenga el secado lo antes posible para evitar una exposición prolongada al calor. También se pueden construir deshidratadores caseros de mayor tamaño que generen calor con bombillas incandescentes y flujo de aire con ventiladores. Consulte la publicación de ECHO sobre la conservación de semillas en la sección «Recursos adicionales» para obtener orientación.
Tendedero
Se pueden reutilizar simples rejillas de ventanas viejas o construirlas a la medida y equiparlas con ventiladores de caja para mantener el aire circulando sobre las semillas. También se pueden modificar los gabinetes agregándoles ventiladores. Si bien estos son excelentes para secar diversos tipos y volúmenes de semillas, no las secarán por completo en ambientes húmedos sin aire acondicionado, como un granero. En estos casos, es posible que sea necesario rotar las pilas de semillas con frecuencia. Según nuestra experiencia, al utilizarlas en un granero sin aire acondicionado, las estructuras de secado son suficientes para eliminar la humedad necesaria y hacer que el siguiente paso en el procesamiento de las semillas sea más eficiente, ya que algunos tipos de cultivos con semillas en vainas pueden ser muy difíciles de procesar cuando no están completamente secas (por ejemplo, frijoles, chicharrones y brassicas).
Armario de secado
Si se cuenta con un armario pequeño u otro espacio cerrado que tenga acceso a la corriente eléctrica, se puede habilitar un armario de secado temporal. Lo ideal es que el armario esté aislado con paneles de espuma y que las rendijas de la puerta estén selladas para evitar fugas de aire. Coloca estantes de alambre, un deshumidificador pequeño y un ventilador pequeño de circulación dentro del armario. El aumento de temperatura ayudará al secado, además de las condiciones de deshumidificación. Todos estos materiales se pueden comprar a bajo costo en tiendas de mejoras para el hogar. Los gastos de electricidad son mínimos y la instalación puede costar solo unos pocos cientos de dólares.
Sala de secado y almacenamiento de semillas de las cooperativas Working Food y Florida Wildflower
Los agricultores que cuenten con grandes cantidades de semillas y con espacio de almacenamiento dedicado y disponible pueden construir una sala de secado de semillas. La sala de secado y almacenamiento de semillas que utiliza Working Food en Gainesville, Florida, sigue el modelo de la construida en The Florida Wildflower Cooperative, diseñada para ofrecer condiciones de almacenamiento de alta calidad para un uso a mediano y corto plazo (menos de 10 años de almacenamiento). Se trata de una cámara fría de 10×10 pies con paneles aislantes, sellada para evitar fluctuaciones de temperatura y humedad. El ambiente se mantiene bastante estable durante todo el año a 72°F mediante un aire acondicionado de ventana que ventila hacia el exterior. La humedad relativa se mantiene por debajo del 35 %, y a menudo desciende aún más durante los meses más fríos y secos. Esto se logra con un deshumidificador que funciona de manera continua y cuenta con una manguera que drena hacia el exterior del edificio. Los dos aparatos electrodomésticos, comprados en tiendas de artículos para el hogar, funcionan de manera continua y son suficientes para los fines de un banco comunitario de semillas que las almacena durante un período de 1 a 10 años. Todas las grietas y agujeros están sellados, y las luces se mantienen apagadas excepto cuando se utilizan. Si bien el costo de la energía variará según la empresa de servicios públicos, esta unidad consume aproximadamente 1,100 vatios y su funcionamiento cuesta alrededor de $1,000 al año. Este espacio también se puede utilizar para secar hojas de hierbas, plantas medicinales y flores. Hemos observado excelentes tasas de germinación en semillas de más de siete años de antigüedad en condiciones que, si bien no son perfectas, son factibles y económicas. Es probable que la mayoría de los agricultores guarden las semillas por un período más corto que este, a menos que estén almacenando grandes cantidades de semillas para uso a largo plazo.
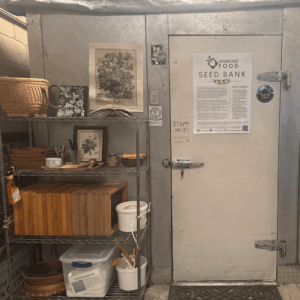
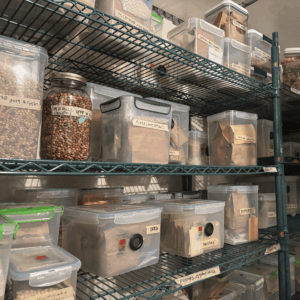
Una cámara frigorífica (izquierda) convertida en un cuarto seco para almacenar y secar semillas (derecha). Foto: Melissa DeSa, Working Food
¿Cuándo está lo suficientemente seca la semilla?
En los sistemas de producción de semillas a gran escala, se utilizan medidores de humedad de alta tecnología para evaluar el contenido de humedad de las semillas. Como alternativa, los niveles de humedad pueden determinarse comparando el peso fresco con el peso seco. Es posible que los medidores de humedad no sean fácilmente accesibles para el agricultor típico de pequeña escala y, por lo general, no son necesarios. Los productores de menor escala pueden recurrir a algunos métodos rudimentarios pero eficaces para evaluar el contenido de humedad de las semillas; concretamente, las pruebas de mordida, aplastamiento o rotura (véase más abajo para mayor detalle). Otro método sencillo consiste en utilizar la tabla adjunta (Tabla 3) para estimar el contenido de humedad de las semillas en función del tipo de cultivo y la humedad relativa.
Tabla 3: Aproximaciones del contenido de humedad de algunas semillas de cultivos comunes a 77 °F (25 °C).
| La lectura de la humedad relativa (HR) se puede realizar fácilmente con un higrómetro. Lo ideal es que el contenido de humedad de las semillas se sitúe entre el 3 % y el 8 % (Manual del IBPGR, 1985). En el caso de las semillas que no figuran en la lista, el valor se puede estimar basándose en el cultivo más cercano. Adaptado de Rao et al. (2006). | ||||||||
| Cultivo | Humedad relativa (%) | |||||||
| 10 | 15 | 20 | 30 | 45 | 60 | 75 | 90 | |
| Semillas oleaginosas: el contenido de humedad ideal es del 3 % al 8 %. | ||||||||
| Repollo | 2.9 | – | 4.6 | 5.4 | 6.4 | 7.6 | 9.6 | – |
| Mostaza | 1.8 | – | 3.2 | 4.6 | 6.3 | 7.9 | 9.4 | – |
| Rábano | 2.6 | – | 3.8 | 5.1 | 3.9 | 8.3 | 10.2 | – |
| Berenjena | 3.1 | – | 4.9 | 6.3 | 9.0 | 9.8 | 11.9 | – |
| Cacahuete | 3.0 | – | 3.9 | 4.2 | 5.6 | – | 9.8 | 13.0 |
| Okra | 3.8 | – | 7.2 | 8.3 | 10.0 | 11.2 | 13.1 | – |
| Soja | 4.1 | – | 5.5 | 6.5 | 7.4 | 9.3 | 13.1 | 18.8 |
| Nabo | 2.6 | – | 4.0 | 5.1 | 6.3 | 7.4 | 9.0 | – |
| Semillas no oleaginosas, con un contenido de humedad ideal del 7 al 11 % | ||||||||
| Frijol de Lima | 4.6 | – | 6.6 | 7.7 | 9.2 | 11.0 | 13.8 | – |
| Remolacha | 2.1 | – | 4.0 | 5.8 | 7.7 | 9.4 | 11.2 | – |
| Trigo sarraceno | – | 6.7 | – | 9.1 | 10.8 | 12.7 | 15.0 | 19.1 |
| Zanahoria | 4.5 | – | 5.9 | 6.8 | 7.9 | 9.2 | 11.6 | – |
| Pepino | 2.6 | – | 4.3 | 5.6 | 7.1 | 8.4 | 10.1 | – |
| Lechuga | 2.8 | – | 4.2 | 5.1 | 5.9 | 7.1 | 9.6 | – |
| Maíz (corn) | 3.8 | – | 5.8 | 8.4 | 10.2 | 12.7 | 14.4 | 18.8 |
| Avena | – | 5.7 | – | 8.0 | 9.6 | 11.8 | 13.8 | 18.5 |
| Guisante | 5.4 | – | 7.3 | 8.6 | 10.1 | 11.9 | 15.0 | – |
| Arroz | 4.6 | 5.6 | 6.5 | 7.9 | 9.8 | 11.8 | 14.0 | 17.6 |
| Sorgo | – | 6.4 | – | 8.6 | 10.5 | 12.0 | 15.2 | 18.8 |
| Squash | 3.0 | – | 4.3 | 5.6 | 7.4 | 9.0 | 10.8 | – |
| Tomate | 3.2 | – | 5.0 | 6.3 | 7.8 | 9.2 | 11.1 | – |
| Sandía | 3.0 | – | 4.8 | 6.1 | 7.6 | 8.8 | 9.0 | – |
En el caso de las semillas más grandes, como las de calabaza, que se pueden sujetar con los dedos o con unos alicates pequeños, se puede comprobar si están secas intentando partirlas por la mitad. Si las semillas se rompen limpiamente, están lo suficientemente secas; sin embargo, si se doblan o no se rompen limpiamente, necesitan secarse más. De manera similar, las semillas como el maíz o los frijoles se pueden evaluar golpeándolas con un martillo sobre una superficie dura: si se rompen en pedazos, están secas, pero si se aplastan o se «machacan», aún contienen demasiada humedad y necesitan más tiempo de secado. Otro método consiste en morder ligeramente la semilla; si quedan marcas de mordida, la semilla está demasiado húmeda y debe secarse más hasta que resista la presión.
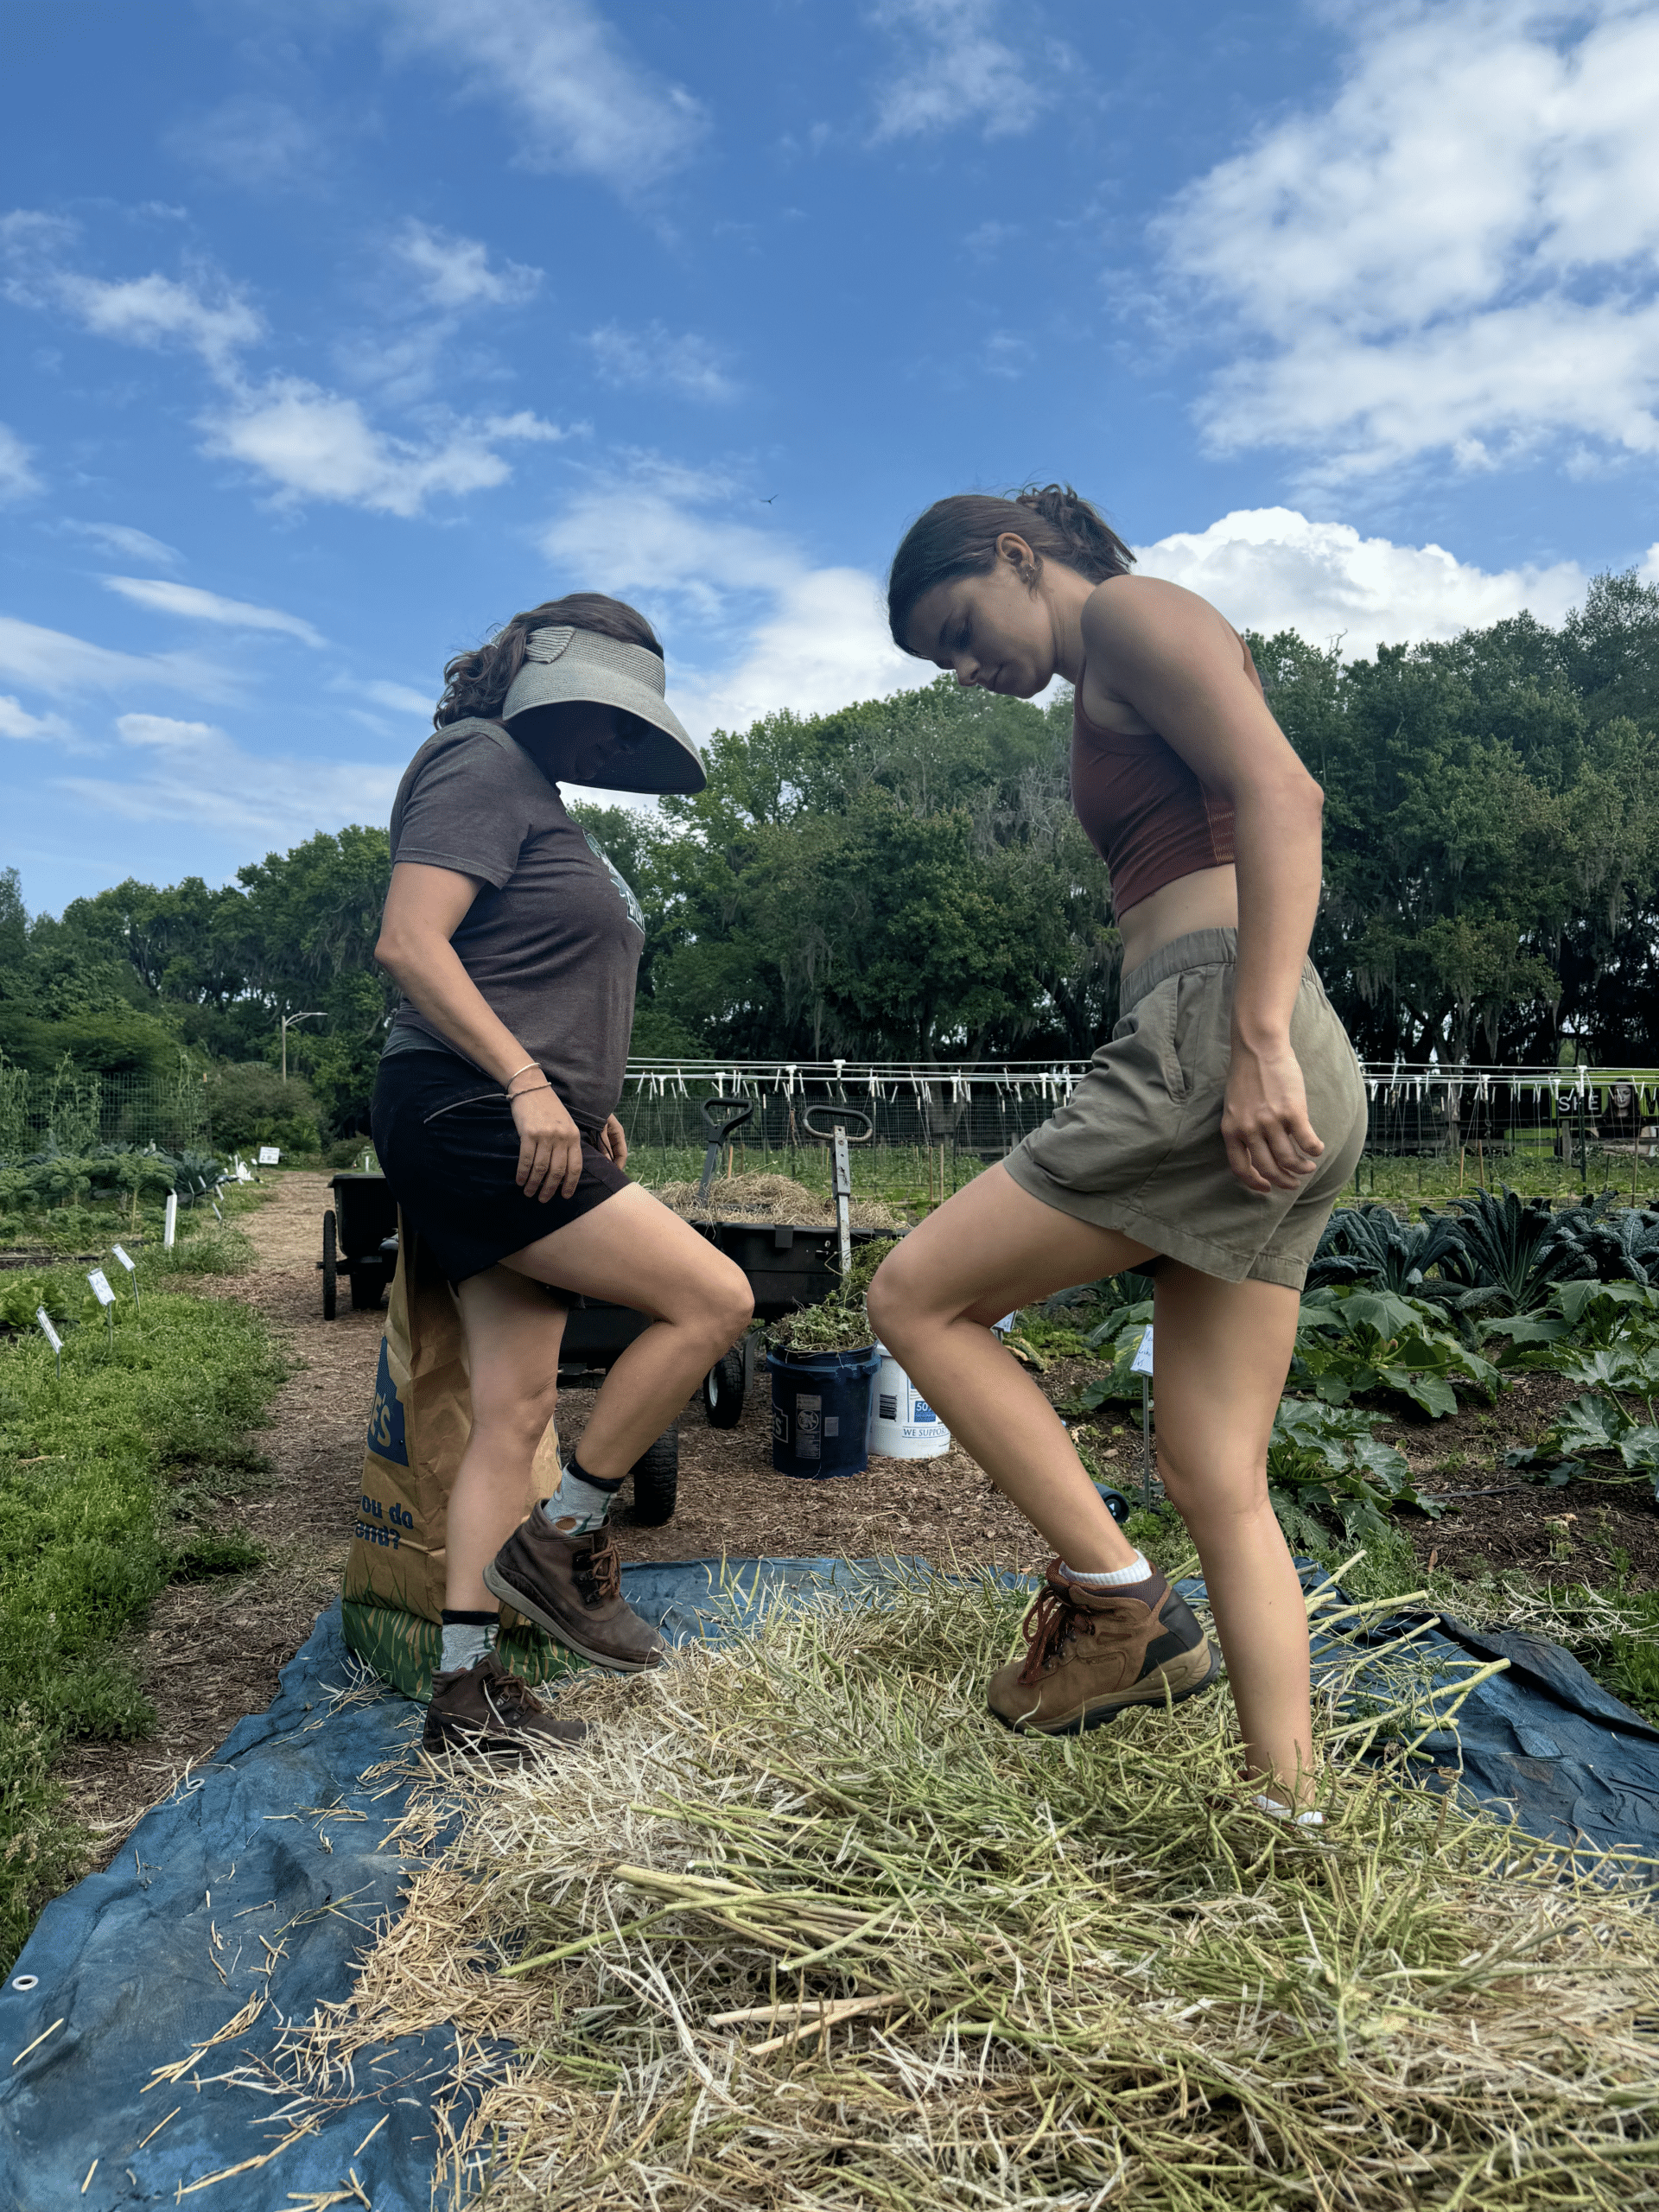
Las vainas secas, cortadas de las plantas de col rizada etíope, se pisotean sobre una lona. Si las semillas están realmente secas, la mayoría se desprenderá fácilmente de sus vainas. Al ajustar la lona, las semillas pequeñas quedarán en el fondo y el resto del material vegetal se puede recoger a puñados y retirar. Verter el contenido sobre una malla del tamaño adecuado y luego aventar las semillas frente a un ventilador será probablemente lo único que un agricultor necesite hacer para que las semillas queden lo suficientemente limpias. Foto: Melissa DeSa, Working Food
Equipos para el procesamiento de semillas
Los agricultores han encontrado muchas formas de procesar semillas, y se necesita práctica y algo de ingenio para fabricar equipos sencillos que ayuden a que el proceso sea más eficiente. Pisarlas, pasar un vehículo por encima, revolverlas en un cubo con cadenas o palos y golpearlas de un lado a otro en un recipiente son tareas fáciles de realizar utilizando equipos que probablemente ya se encuentren en la granja, o con herramientas económicas y artilugios de bricolaje. Si una granja aumenta el volumen de semillas que procesa, es posible que necesite maquinaria más específica, como trilladoras y tolvas, para procesarlas de manera eficiente.
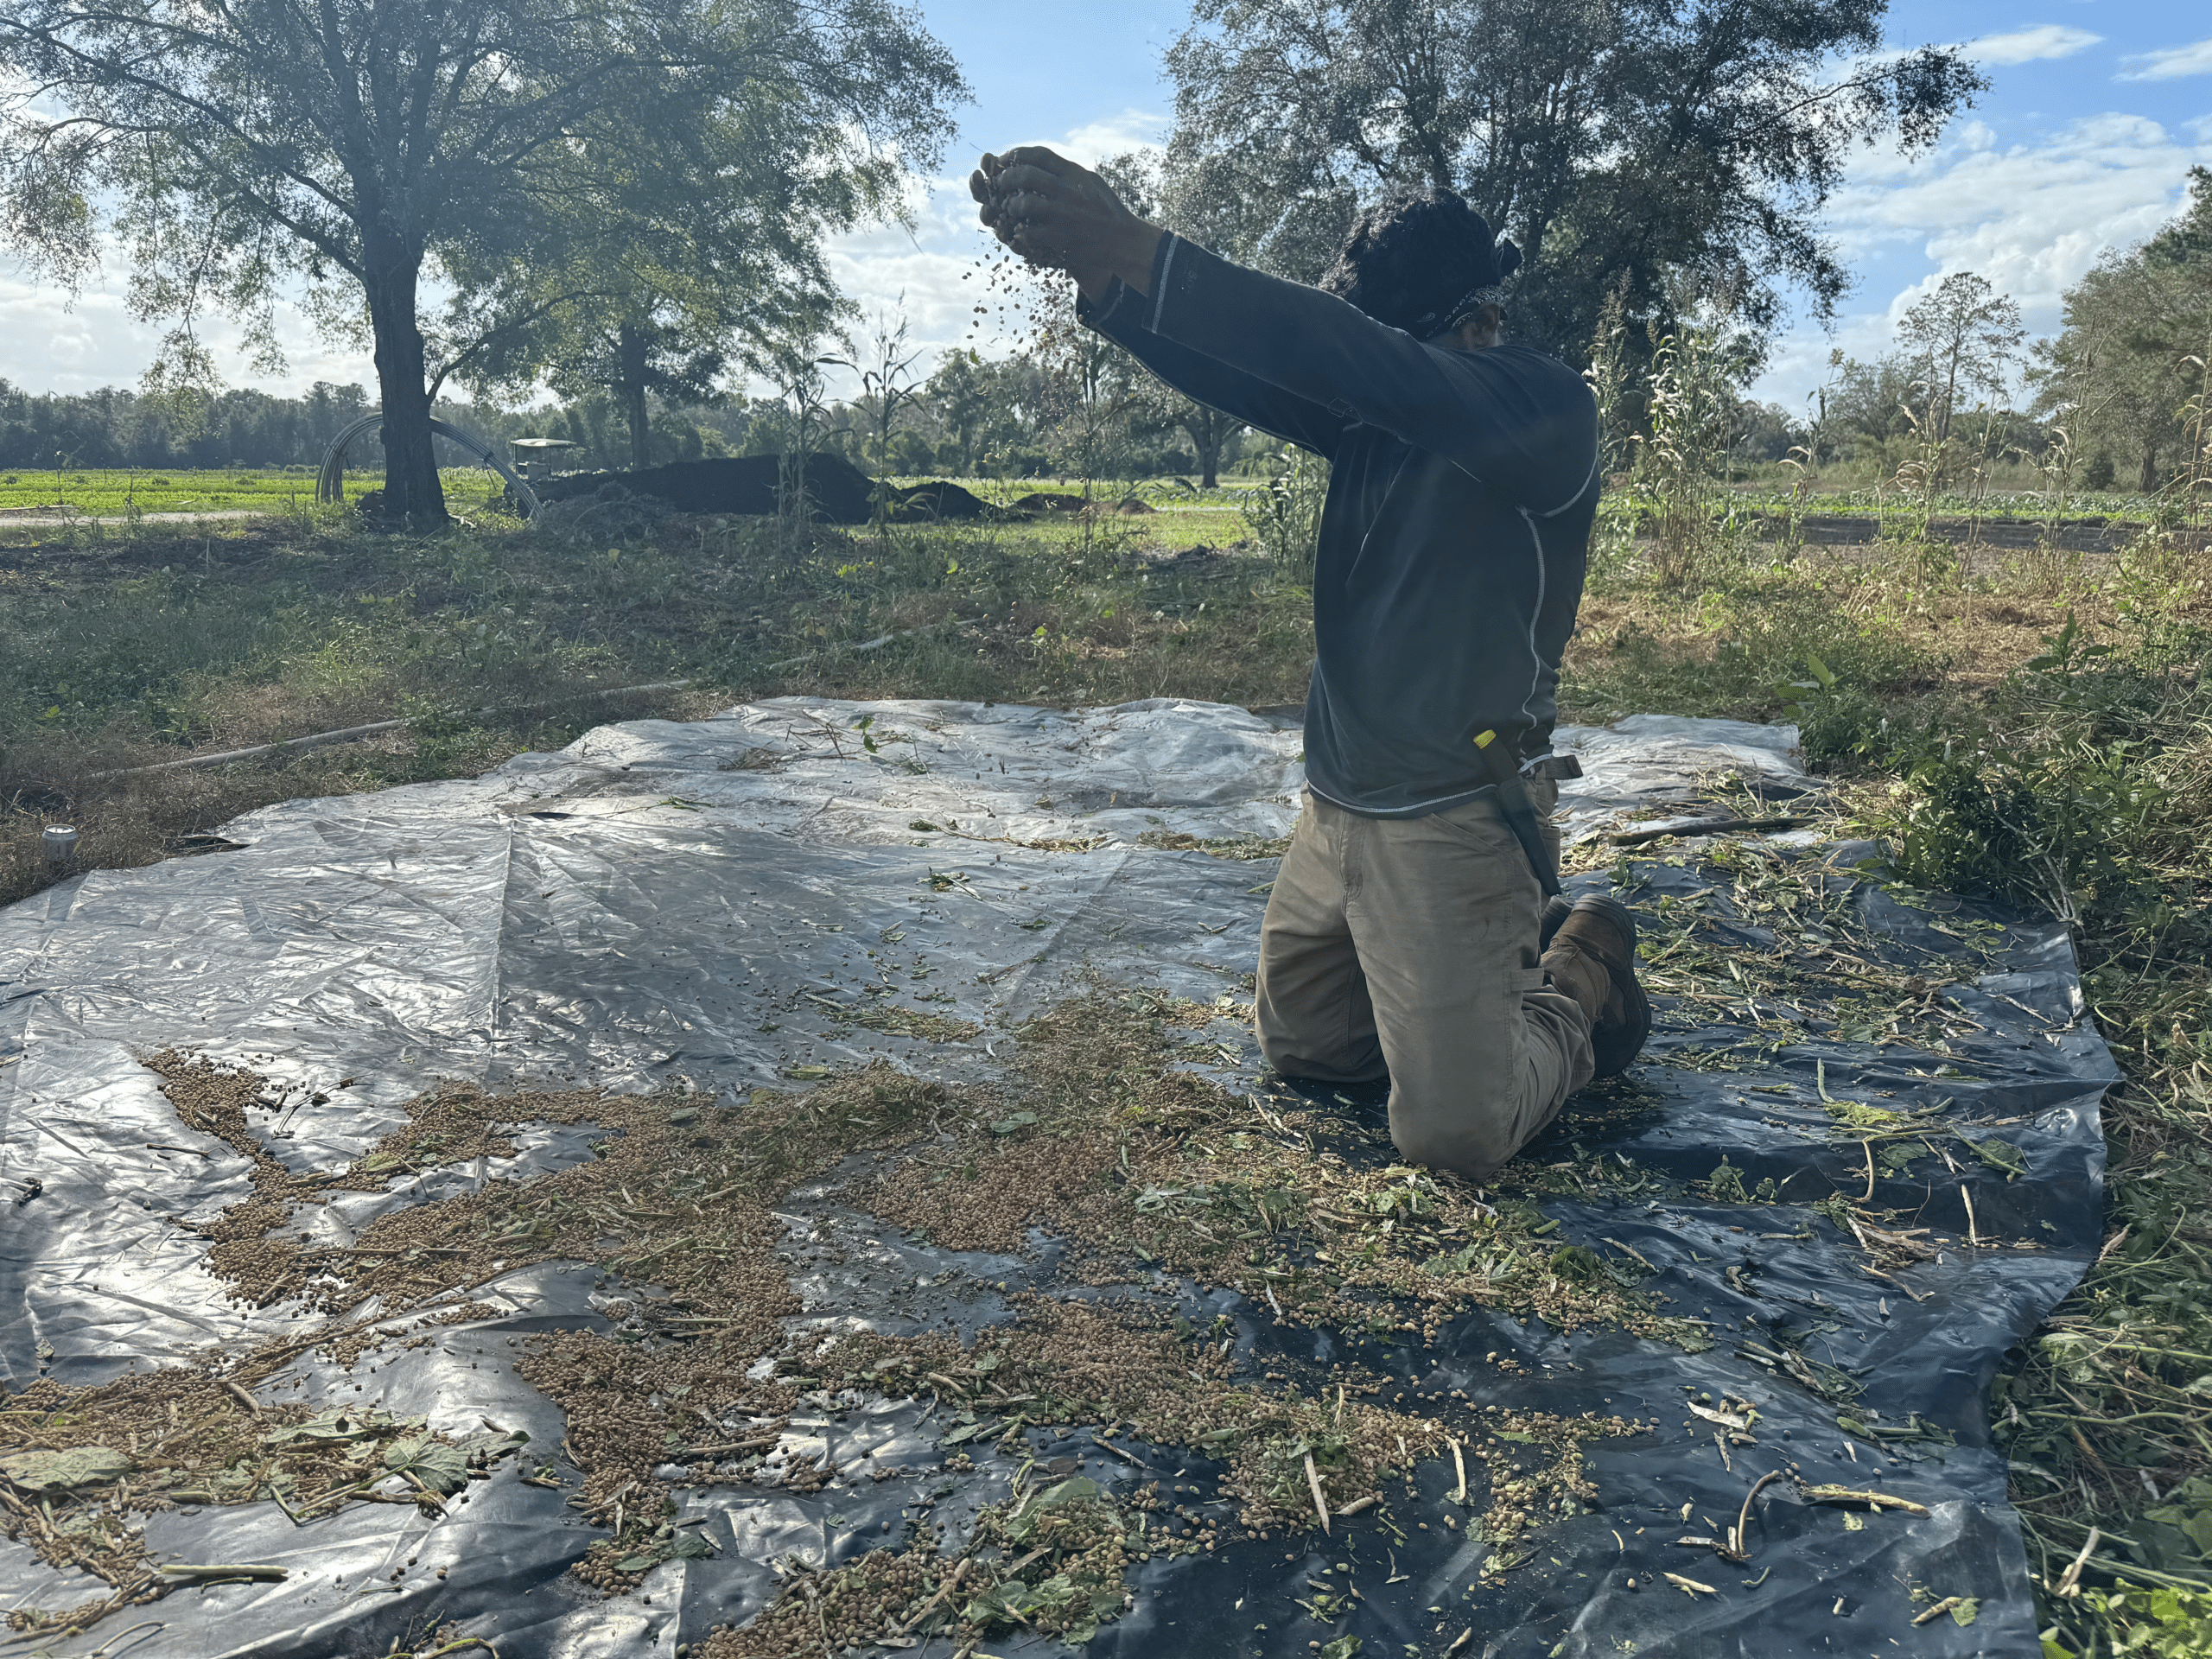
Los frijoles de vaca, una vez trillados y separados de las vainas —primero pisoteándolos o golpeándolos con un palo—, se dejan caer desde lo alto varias veces para que los residuos más ligeros se lleven con el viento. Esto funciona mejor en días ventosos o con un ventilador. Foto: Melissa DeSa, Working Food
Una vez que las semillas están prácticamente separadas, se pueden limpiar y clasificar aún más para eliminar el material no deseado y las semillas de mala calidad; el grado de este proceso depende de los objetivos del agricultor. Si las semillas son principalmente para uso personal, bastará con una limpieza sencilla y un secado adecuado antes de almacenarlas. Si se van a vender o compartir a mayor escala, puede ser necesario realizar una limpieza más minuciosa de las semillas, y es útil contar con las herramientas adecuadas.
La mayoría de las granjas ya cuentan con equipo que resultará útil para la cosecha y el procesamiento de semillas, como cubetas, contenedores, lonas y ventiladores de caja. Contar con equipo adicional para el procesamiento de semillas resulta útil a medida que los agricultores comienzan a cultivar y cosechar más semillas propias, lo que hace que el trabajo sea más fácil y eficaz. ¡Es una de las cosas más satisfactorias: tomar un montón de material vegetal marrón y, mediante pasos sucesivos, separarlo hasta obtener una cubeta de semillas limpias!
El cribado de las semillas para separarlas del material vegetal y los residuos puede incorporarse fácilmente a tu proceso, lo que te permitirá ahorrar una cantidad significativa de tiempo. Comienza con un marco de madera hecho a mano con malla metálica o tela de mosquitero. Existen cribas de diferentes tamaños para casi todos los cultivos, y cuanto más específica sea la criba, más mejorará tu proceso de limpieza de semillas. Para las granjas de semillas a gran escala, se pueden incorporar a tu producción equipos de limpieza de semillas, como el Clipper Tester and Cleaner, que automatizan el proceso.
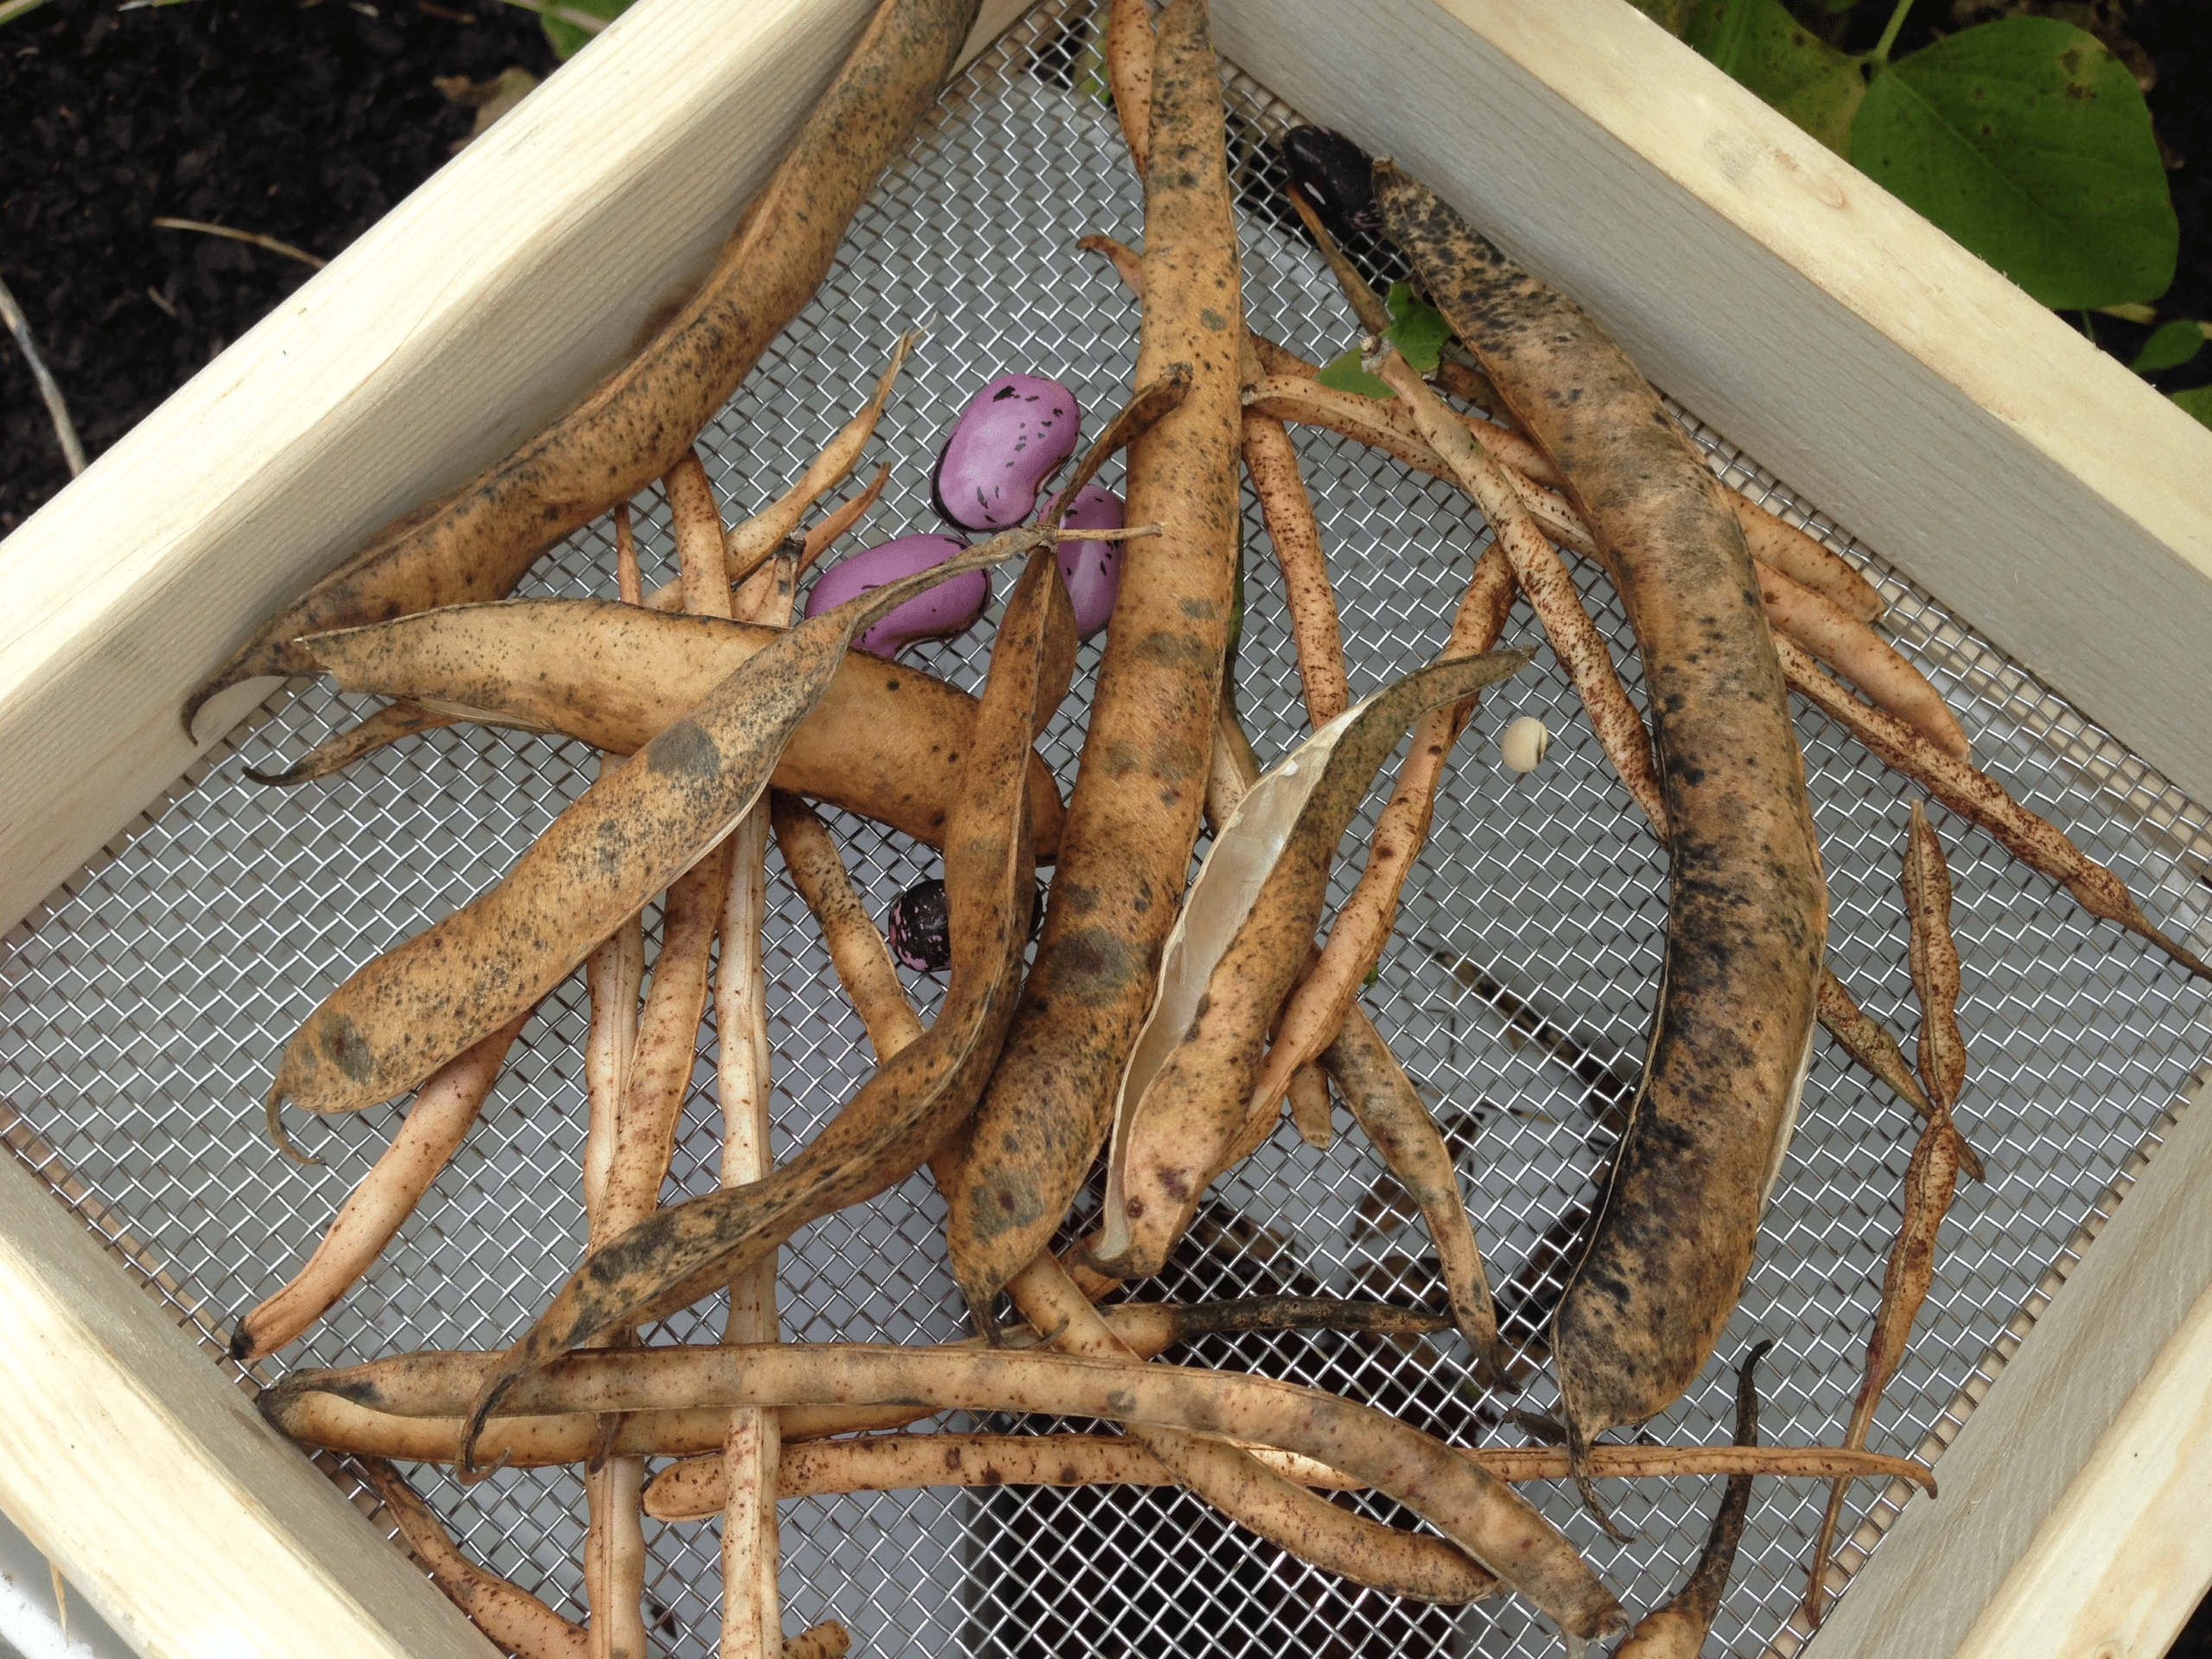
Se pueden fabricar tamices sencillos o comprarlos en cualquier tamaño para tipos específicos de semillas. Foto: Melissa DeSa, Working Food.
Las bolsas de malla son ideales para guardar cápsulas de todo tipo, ya que permiten la circulación del aire si se cuelgan a secar en el lugar adecuado o se colocan sobre rejillas de alambre. Asegúrate de que el tamaño de la malla sea el adecuado para retener el material vegetal. Muchas granjas ya cuentan con bolsas de malla para productos agrícolas, como papas y zanahorias, que pueden utilizarse.
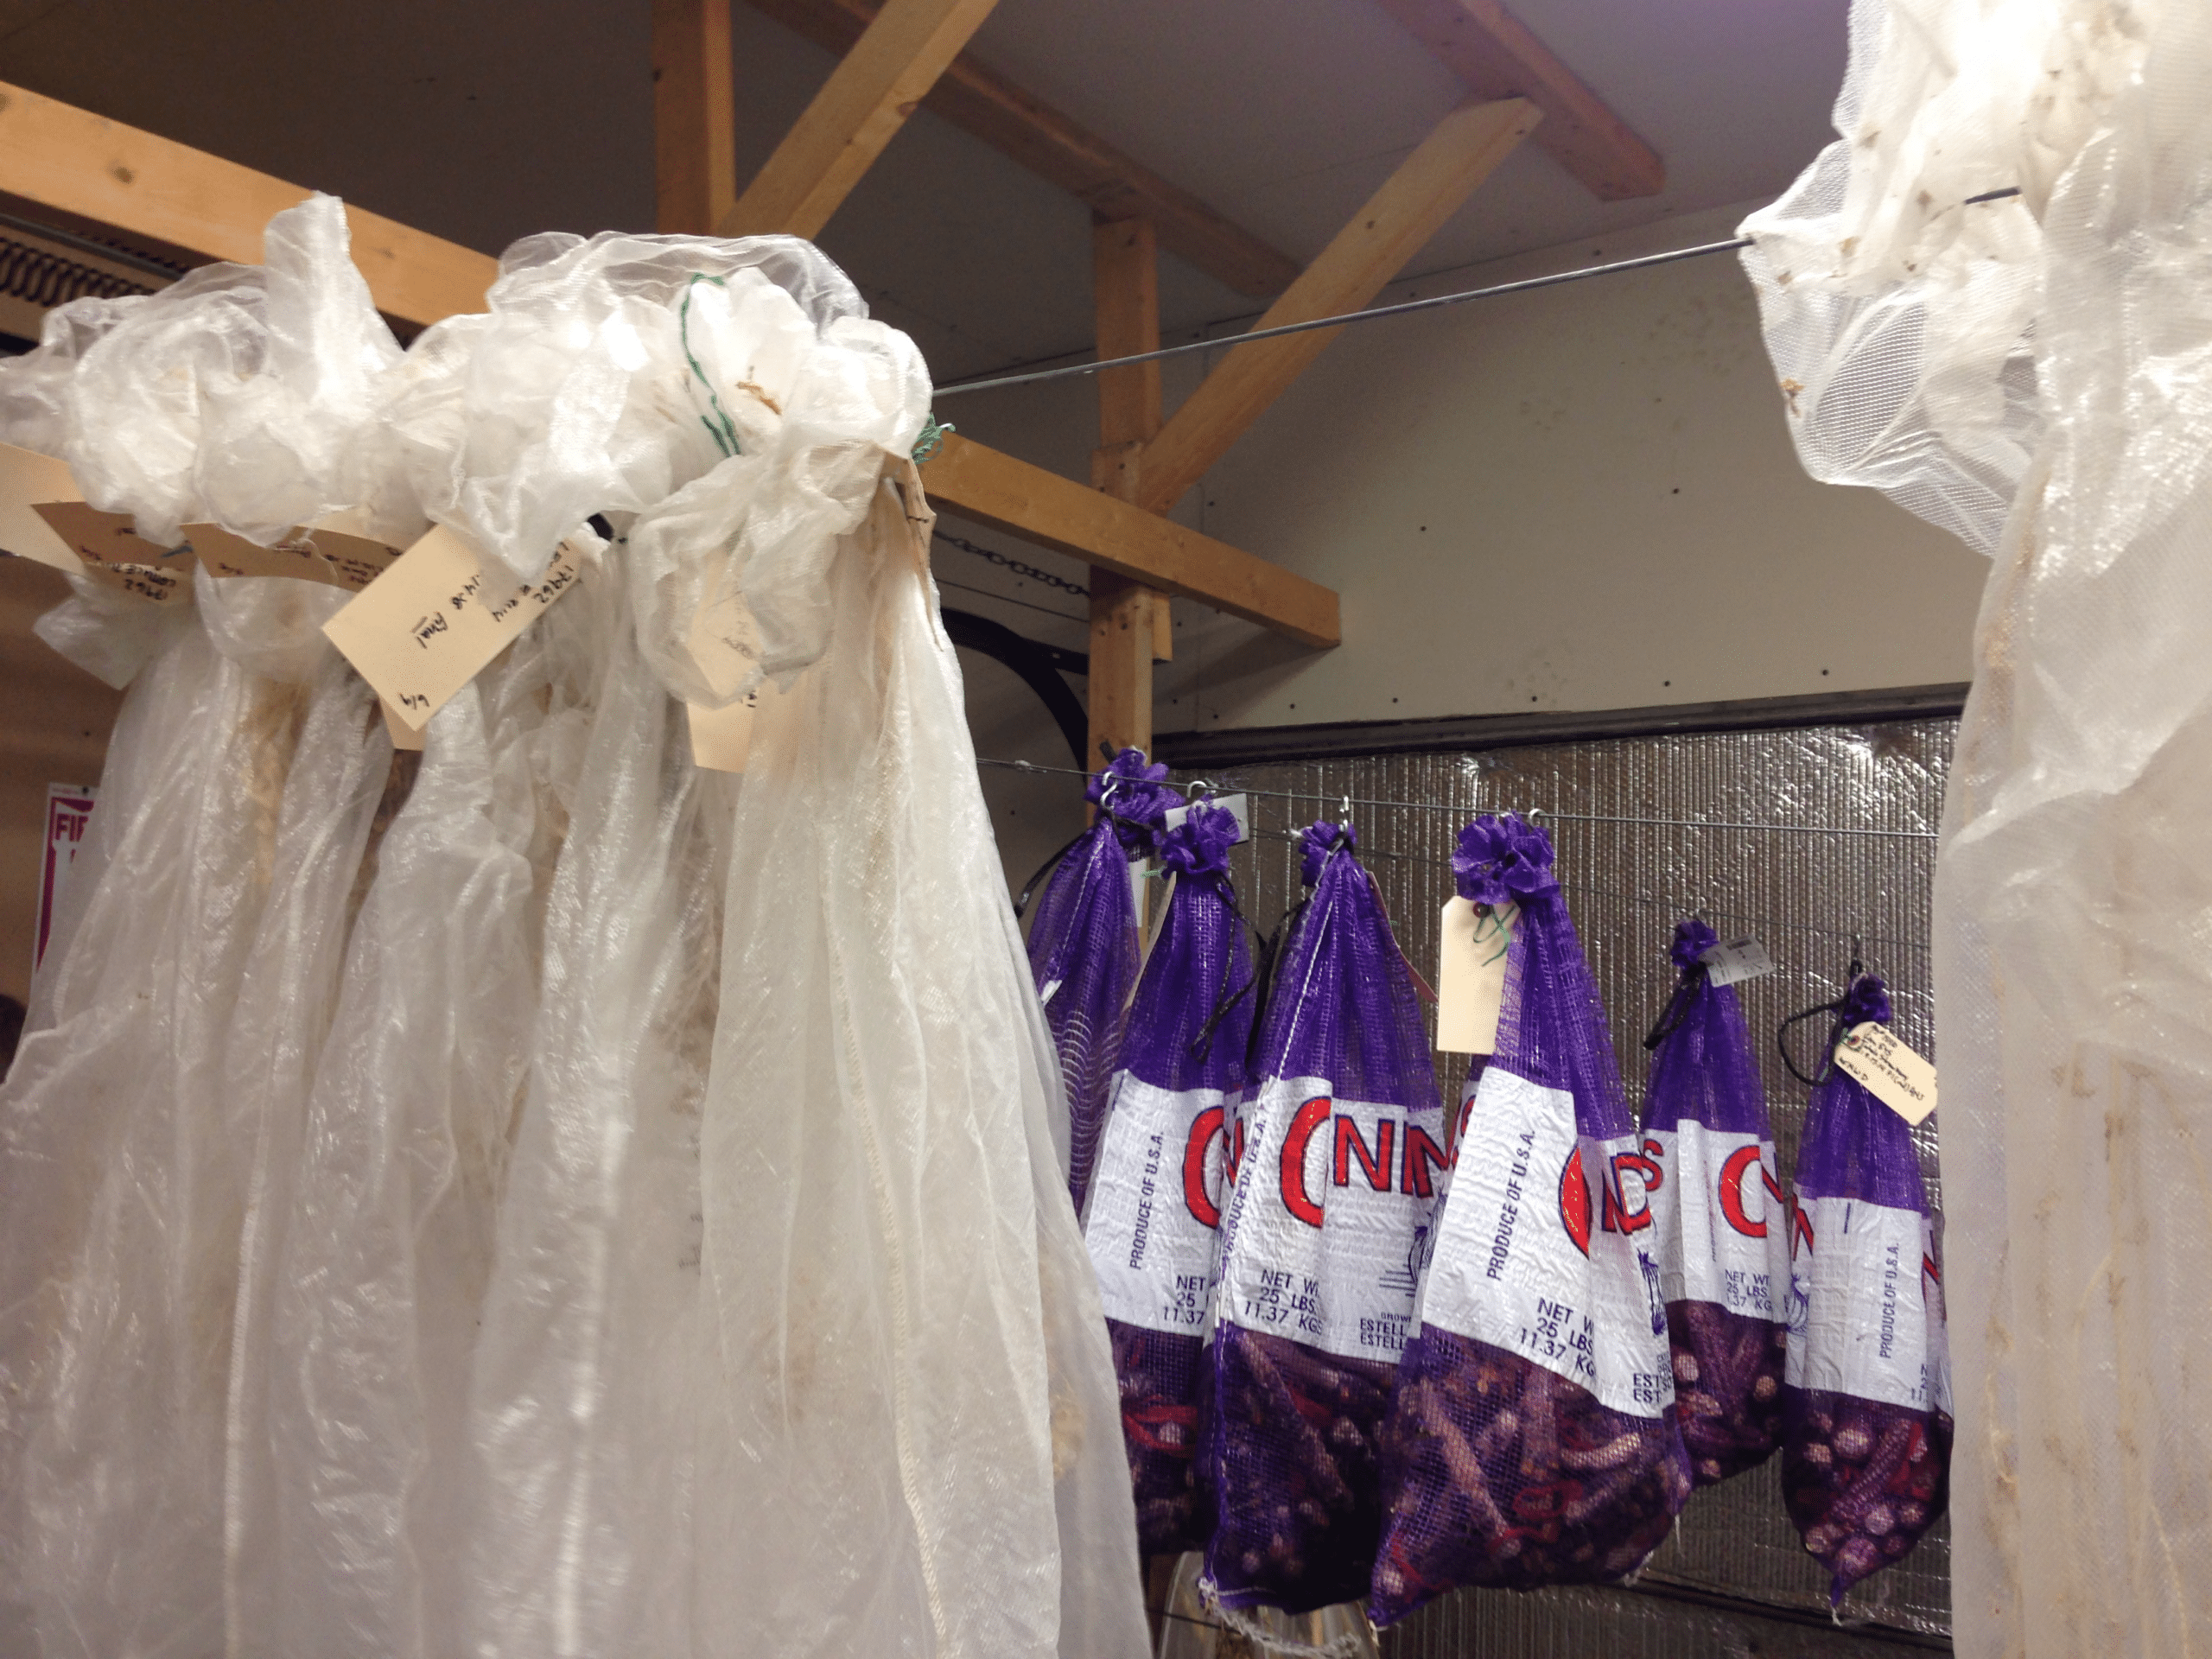
Las bolsas de malla facilitan el secado de las semillas y la circulación del aire. Lo ideal es hacerlo en un espacio con clima controlado, pero, como mínimo, en un área cubierta con suficiente ventilación y ventiladores. Estas bolsas contienen ajo, pero también podrían contener semillas secas y vainas. Foto: Melissa DeSa, Working Food
Los aspiradores de semillas caseros se pueden construir utilizando planos de diseño gratuitos en línea, como este de Real Seeds, y funcionan bien para separar las semillas pequeñas sin desarrollar y cualquier resto de paja que quede después de la primera separación. Muchos productores de semillas a pequeña escala cuentan con uno. Ocupan poco espacio, son muy eficaces y, a menudo, son suficientes para una limpieza y separación finales de las semillas.
Herramientas como el Winnow Wizard son ideales para la limpieza precisa de semillas. Estas eliminan semillas inmaduras, suciedad, arena y otros materiales no deseados que otros métodos no logran eliminar por completo. Solo valen la pena para los agricultores que procesan grandes volúmenes de semillas, que las venden y desean que tengan un acabado lo más profesional posible. Compartir un Winnow Wizard con otros productores de la zona sería una forma más económica y eficaz de tener acceso a esta maquinaria.
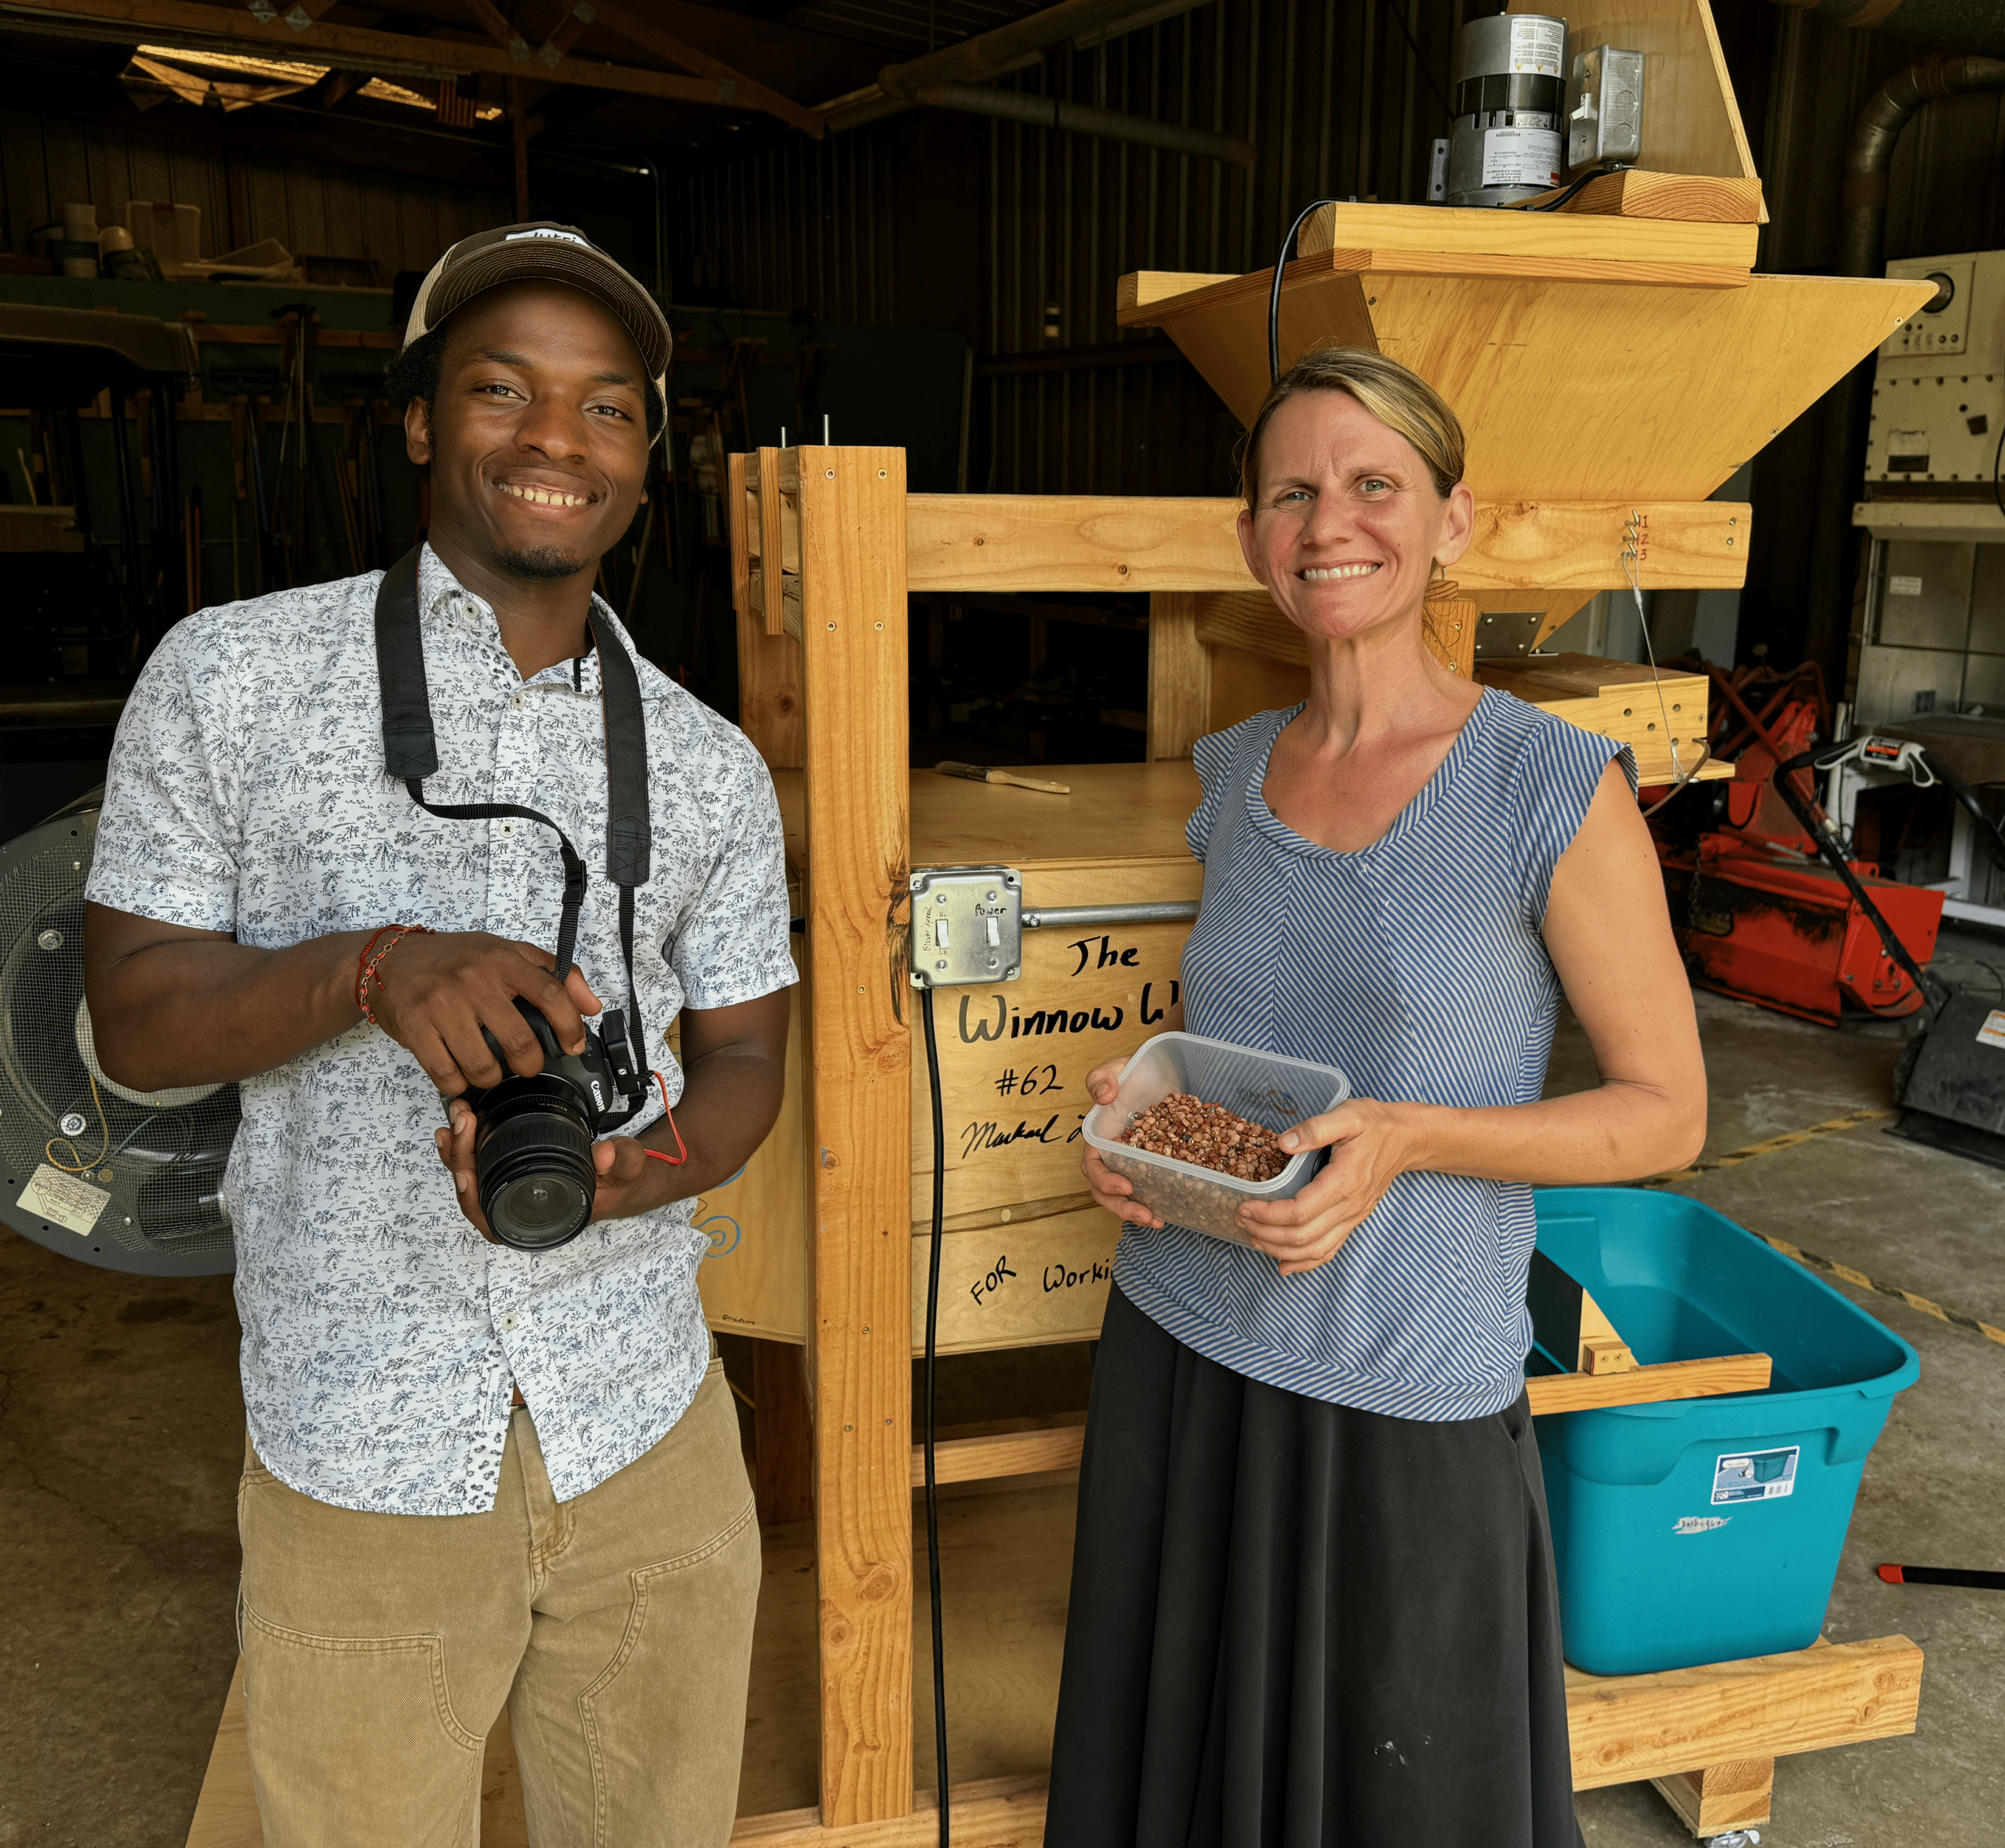
Un Winnow Wizard es un equipo especializado y fabricado a mano para la limpieza de semillas, que se utiliza en la etapa final del proceso de limpieza. Este es el paso final para producir semillas limpias y de alta calidad, lo que aumentará el porcentaje de germinación de un lote de semillas al eliminar aquellas de mala calidad que son difíciles de separar por otros medios. Foto: Markael Luterra
Almacenamiento
Los frascos para conservas u otros frascos y recipientes con una junta de hule que cierre herméticamente son económicos y eficaces para mantener fuera la humedad y el aire. Los paquetes o bolsas de semillas se pueden colocar dentro de los recipientes. Almacenar las semillas en bolsas abiertas de papel o malla, que permiten la circulación de aire, no es suficiente para un buen almacenamiento. Las bolsas de plástico tampoco son adecuadas, ya que son porosas, tienen un cierre con cremallera poco confiable y no pueden impedir eficazmente la entrada de aire y humedad. Llenar los recipientes al máximo es una buena estrategia para eliminar el oxígeno disponible alrededor de las semillas, lo que reduce la incidencia de plagas de insectos como los gorgojos (Dareus, 2021).
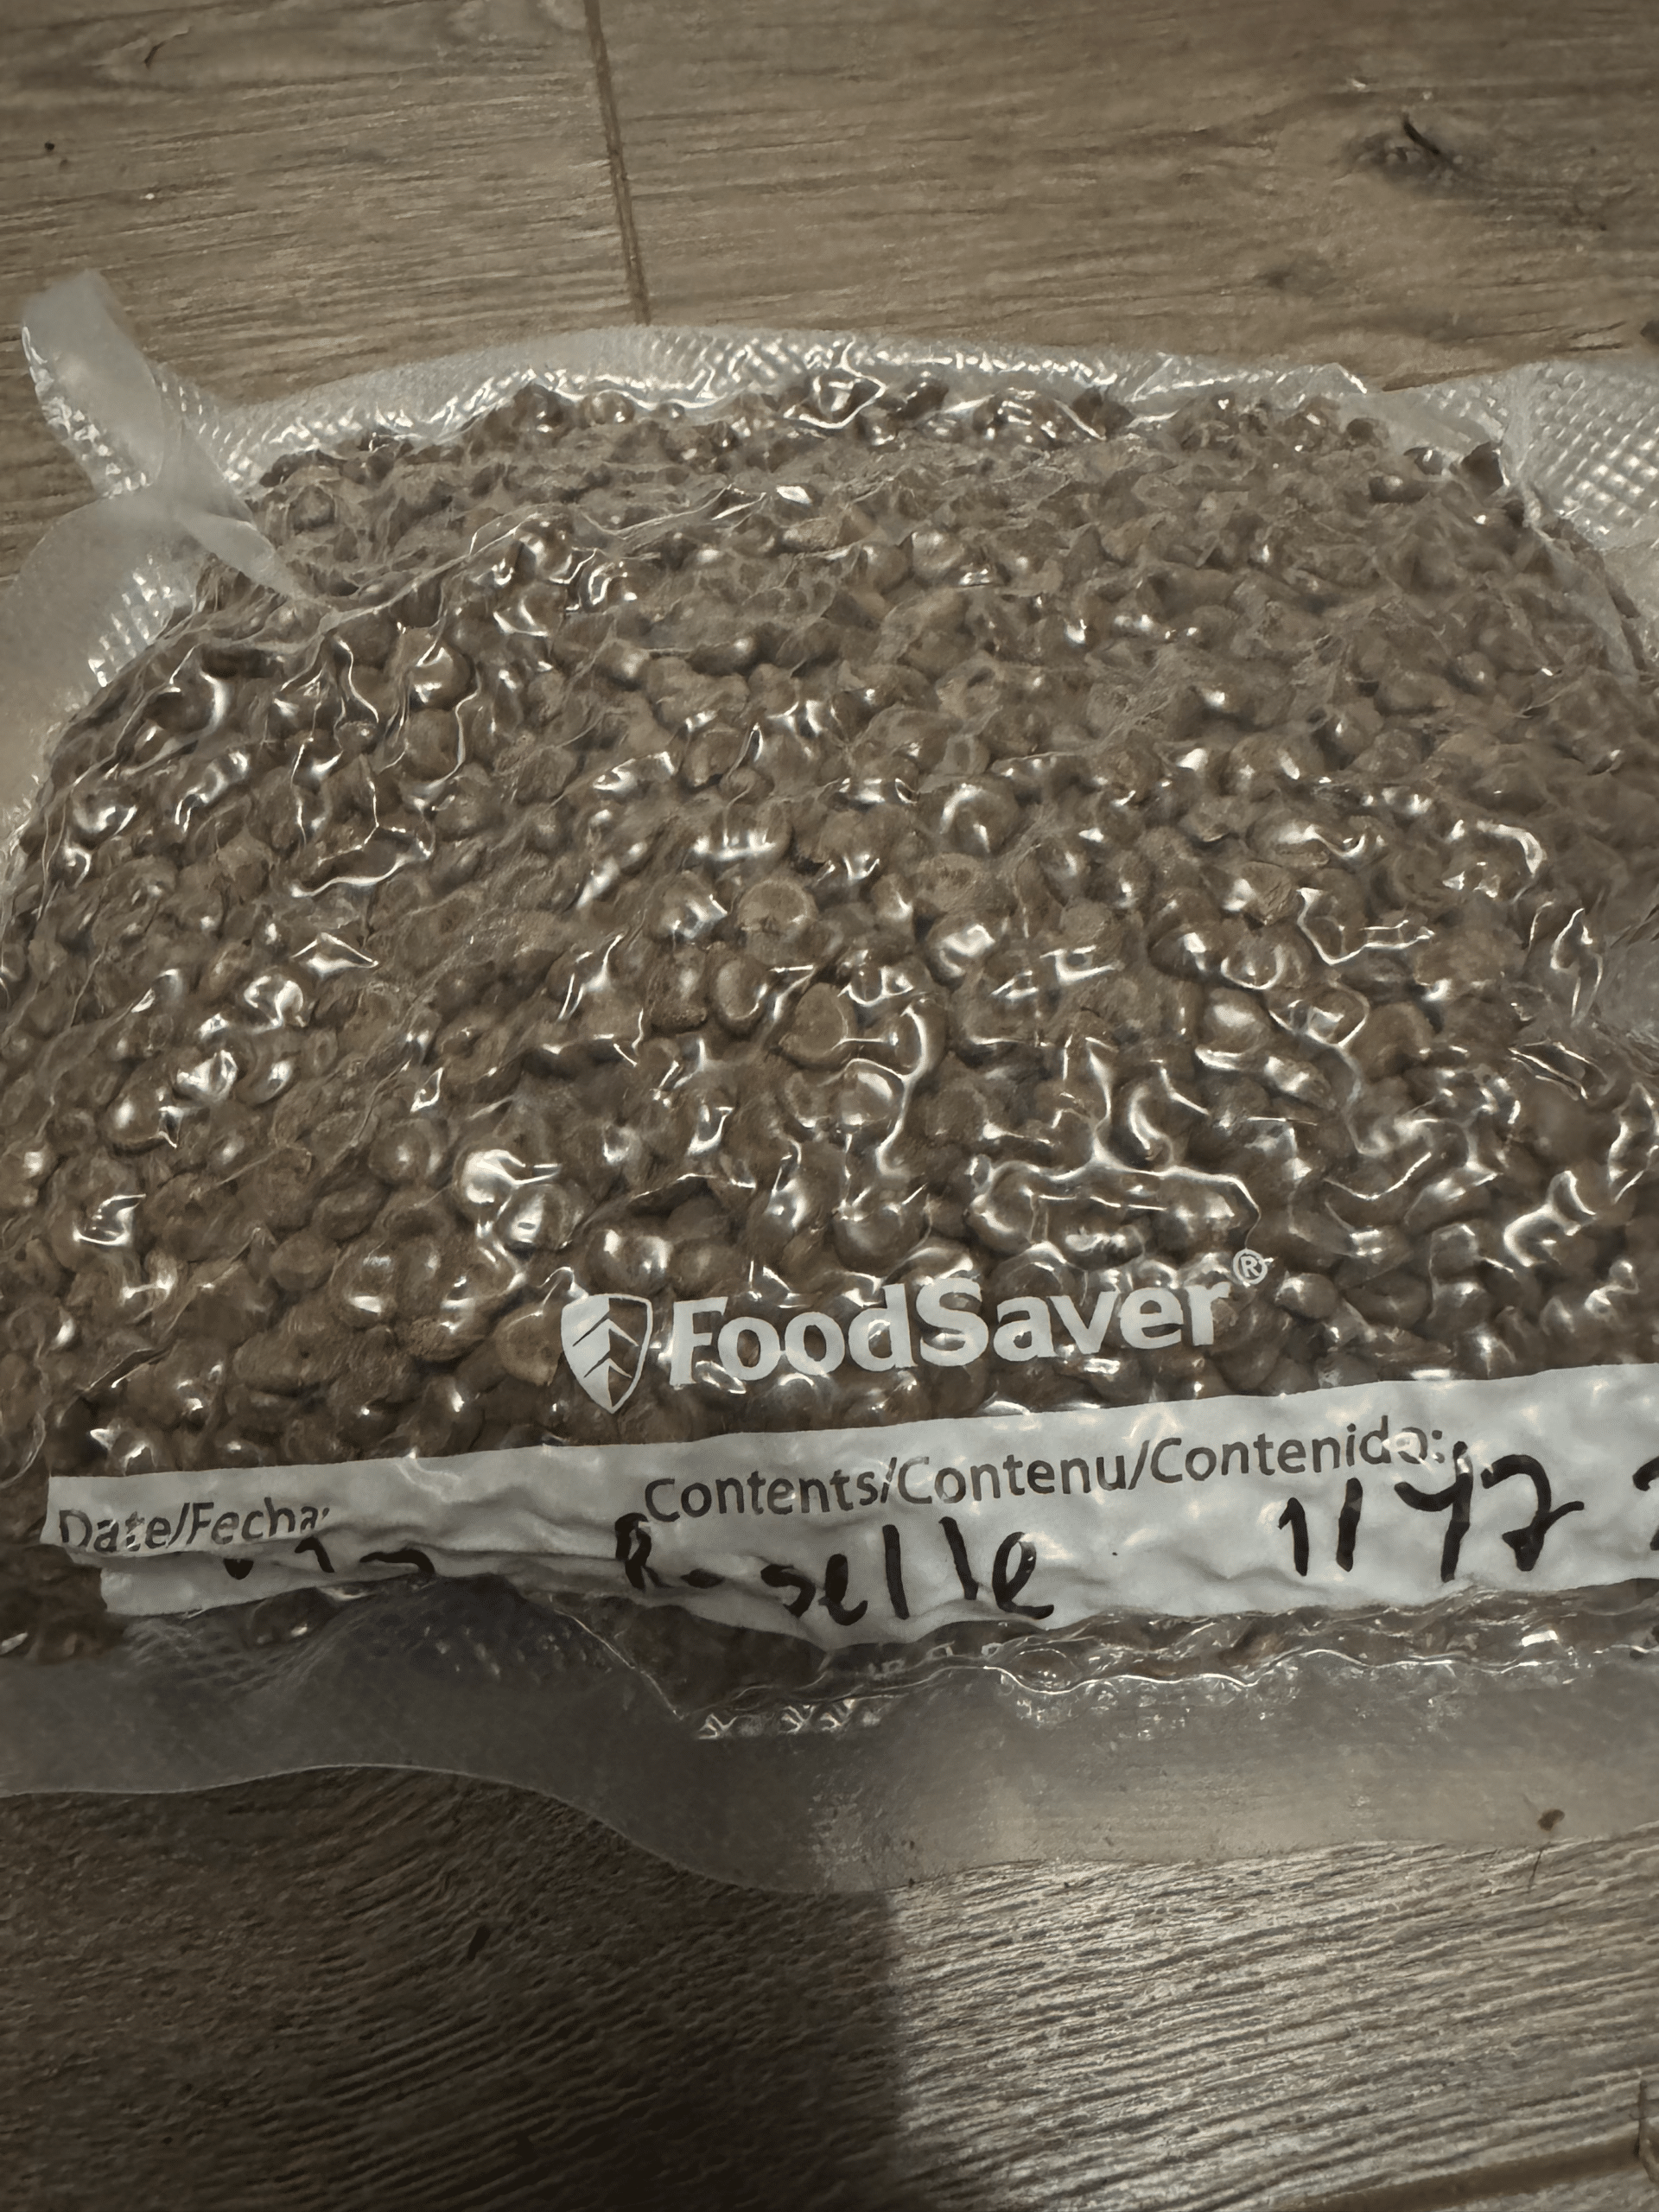
Una muestra de semillas de rosella envasadas al vacío. Foto: Melissa DeSa, Working Food
Envasado al vacío
Para el almacenamiento de semillas a largo plazo, el sellado al vacío es una opción excelente y sencilla. Se evita que la humedad entre al recipiente sellado y se reducen los niveles de oxígeno, lo que, según se ha demostrado, prolonga la vida útil de las semillas y reduce la supervivencia de plagas de insectos como los gorgojos (Motis, 2019). Se pueden utilizar selladoras al vacío para alimentos, económicas y de uso doméstico, para sellar bolsas de plástico, y existen accesorios que permiten sellar frascos de conserva.
Algunos aspectos importantes que se deben considerar para el sellado al vacío son el volumen de semillas, un contenido de humedad suficientemente bajo en las semillas antes del sellado y la frecuencia con la que se abrirá el envase sellado. Los grandes volúmenes de semillas deben dividirse y sellarse en cantidades más pequeñas, ya que tener demasiadas semillas en un envase o paquete puede generar un exceso de calor o humedad a medida que respiran. Las semillas deben secarse hasta alcanzar un contenido de humedad lo más bajo posible, de aproximadamente el ocho por ciento, antes del sellado (consulte la Tabla 3 para saber cómo determinar el contenido de humedad de las semillas en función de la humedad relativa). Si el recipiente se abre con frecuencia, el sellado al vacío no es una buena solución. Considere sellar al vacío únicamente las semillas que se almacenarán durante un período prolongado.
Condiciones de almacenamiento
Una vez que las semillas se han limpiado, secado y colocado en recipientes adecuados, es momento de almacenarlas en las mejores condiciones posibles. Lo ideal es que las condiciones de almacenamiento de las semillas sean secas, oscuras, estables y frescas. Si las semillas se secan lo más posible y se colocan en un recipiente hermético, entonces cualquier lugar en un espacio con clima controlado que esté apartado y no se altere con frecuencia es suficiente (por ejemplo, un armario oscuro, debajo de una cama o en un cajón de la cómoda). La congelación prolongará aún más la vida útil de las semillas, pero solo debe utilizarse si estas están completamente secas. Las semillas que no estén completamente secas corren el riesgo de morir si se forman cristales de hielo que rompan las células. Otra consideración importante es la frecuencia con la que se utiliza el congelador. Si se abre con regularidad, esto reduce la estabilidad de las condiciones, ya que la humedad, la temperatura y la luz cambian cada vez que se abre la puerta. La misma lógica se aplica a los refrigeradores domésticos, a los que se accede con frecuencia y que pueden tener mucha humedad.
La “Regla del 100 de Harrington” se utiliza comúnmente para establecer condiciones generales de almacenamiento de semillas. La regla establece que la suma de la humedad relativa (%) y la temperatura (F) no debe superar los 100 (Harrington, 1960). Sin embargo, dado que la humedad es el factor más importante, la regla estipula que la humedad relativa no debe aportar más de la mitad de esa suma. Los agricultores deben buscar condiciones de almacenamiento con menos del 35 % de humedad relativa dentro de contenedores sellados. Una vez que las semillas se encuentren en estas condiciones, se conservarán durante muchos años, dependiendo del tipo de cultivo.
Conclusión
La cosecha de semillas se reduce a conocer las diferencias entre los cultivos de semillas húmedas y secas, reconocer cuándo las semillas están completamente maduras y manejarlas con cuidado durante los procesos de limpieza, secado y almacenamiento. Los cultivos de semillas húmedas requieren la extracción y limpieza minuciosa de la pulpa de la fruta, mientras que los de semillas secas suelen necesitar más tiempo en el campo, un seguimiento cercano de su madurez y protección contra las condiciones climáticas, las plagas y las enfermedades. Para ambos tipos, el éxito depende de observar los indicadores de madurez, cosechar en el momento adecuado y utilizar herramientas sencillas como lonas, tamices, bolsas de malla o deshumidificadores para secar y limpiar las semillas de manera efectiva. El equipo más grande o compartido puede hacer que el proceso sea más eficiente para cosechas grandes, pero incluso los métodos básicos de «hazlo tú mismo» funcionan bien para la conservación de semillas a pequeña escala.
Una vez cosechadas y secadas, las semillas deben almacenarse en recipientes sellados para proteger la inversión de tiempo y recursos dedicada a su producción. Las semillas pueden conservarse a temperatura ambiente en el hogar o la oficina sin necesidad de refrigeración; sin embargo, si se cuenta con almacenamiento en frío, colocar las semillas completamente secas en un refrigerador o congelador prolongará su viabilidad y calidad. El esfuerzo necesario para secar y almacenar semillas es relativamente mínimo, accesible y adaptable a cualquier escala de producción. Por encima de todo, la cosecha y el almacenamiento de semillas son habilidades que mejoran con la práctica, la observación y la adaptación, lo que las convierte en algunas de las prácticas más gratificantes y esenciales para la agricultura sostenible.
REFERENCIAS
Buttala, Lee y Shanyn Siegel. 2015. El jardín de semillas: el arte y la práctica de la conservación de semillas. Seed Savers Exchange.
Dareus, Rocheteau. 2021. «Llénalo hasta el tope: una forma sencilla de reducir el daño causado por los gorgojos en las semillas de maíz almacenadas en recipientes herméticos»
Contenedores. Notas de investigación de ECHO, volumen 2.
DeSa, Melissa. 2025a. Sobre la conservación de semillas en la granja: chiles.
DeSa, Melissa. 2025b. Sobre la conservación de semillas en el huerto: jitomates.
DeSa, Melissa. 2025c. Sobre la conservación de semillas en la granja: calabazas de invierno.
Nota sobre mejores prácticas de ECHO. 2016. Número 5: Almacenamiento de semillas en los trópicos. Almacenamiento de semillas en los trópicos.
Harrington, J. F. 1960. Secado, almacenamiento y empaque de semillas para mantener la germinación y el vigor. Seedman’s Digest 11(1): 16
56-57, 64, 66, 68.
McCormack, Jeffrey. 2004. Procesamiento y almacenamiento de semillas: Principios y prácticas de la cosecha, el procesamiento y el almacenamiento de semillas: un manual de producción orgánica de semillas para productores de semillas de la región del Atlántico Medio y el sur de EE. UU. Subvención del USDA SARE.
Motis, Tim. 2010. Reducción del contenido de humedad de las semillas antes de su almacenamiento. ECHO Development Notes 109: 1–8.
Motis, Tim. 2019. Opciones de sellado al vacío para el almacenamiento de semillas. Notas técnicas de ECHO. Disponible en línea: edn.link/tn93
Navazio, John. 2012. El cultivador de semillas orgánicas: guía para agricultores sobre la producción de semillas de hortalizas. Chelsea Green Publishing.
Osmani, Jena. 2023. ¿Pueden los sistemas de producción de semillas en granja del sureste de EE. UU. suministrar semillas de hortalizas y flores silvestres de alta calidad? Tesis de maestría de la Universidad de Florida.
Rao, N. K., J. Hanson, M. E. Dulloo, K. Ghosh, A. Nowell y M. Larinde. 2006. Manual de manejo de semillas en bancos de genes. Manuales para bancos de genes 8.
Real Seeds. s. f. Planos de código abierto para construir tu propio limpiador de semillas.
AT Ferrell Company. s. f. Clipper Screens.
Recursos adicionales
Videos
Proyecto Utopian Seed: Southeast Seed en YouTube,
Esta serie de videos destaca seis cultivos del sur de Estados Unidos a través de entrevistas con 30 agricultores de 12 estados, lo que da como resultado una exploración de ocho episodios sobre el cultivo de semillas en el sureste. Sirve tanto como guía práctica para la conservación de semillas como para ofrecer una mirada más profunda al patrimonio, la cultura y la ética de las semillas.
Sitios web
Una red global que apoya a los pequeños agricultores y a los trabajadores del desarrollo mediante el intercambio de conocimientos agrícolas prácticos, semillas y soluciones innovadoras para la seguridad alimentaria.
Working Food apoya a los productores en el desarrollo de semillas adaptadas a Florida, brindándoles capacitación práctica, orientación y acceso a herramientas compartidas, gracias a las cuales pueden aprender sobre la selección, la cosecha y el almacenamiento de semillas como parte de prácticas de producción sostenibles.
La Alianza de Semillas Orgánicas empodera a los agricultores al capacitarlos en la conservación de semillas y la selección de variedades, al apoyar proyectos de mejoramiento genético liderados por los agricultores y al promover políticas que protejan la soberanía de las semillas y la integridad de las semillas orgánicas.
Guía para la conservación de semillas
Esta guía ofrece instrucciones paso a paso para ayudar a los agricultores a conservar, seleccionar y cuidar las semillas de manera exitosa, con el fin de garantizar la resiliencia agrícola a largo plazo.
Intercambio de Semillas Southern Exposure
Southern Exposure apoya a los agricultores con semillas de polinización abierta adaptadas a la región y consejos detallados para el cultivo, lo que les permite elegir variedades resistentes a las plagas, enfermedades y condiciones climáticas adversas locales, al tiempo que fomenta la conservación de semillas.
El Proyecto «La Semilla Utópica»
El Proyecto Utopian Seed ayuda a los agricultores a diferenciar sus cultivos y a acceder a mercados de nicho mediante la promoción de variedades únicas, sabrosas y de importancia cultural, al tiempo que conecta a los productores con chefs, mejoradores y profesionales del sector de las semillas. Se trata de un recurso antiguo, por lo que los costos e ingresos que se presentan no están actualizados, pero se incluyen plantillas de presupuesto para que puedas crear tu propio presupuesto para un túnel alto.
Cosecha, secado, procesamiento y almacenamiento de semillas en climas cálidos y húmedos
Por Melissa DeSa, directora de programas de Working Food Collective, y Audrey Kolde, especialista en agricultura del NCAT
Agosto de 2026
©NCAT
IP678
Esta publicación ha sido elaborada por el NCAT a través del programa de Agricultura Sostenible de ATTRA, en el marco de un acuerdo de cooperación con el Departamento de Desarrollo Rural del USDA.