By Audrey Kolde, NCAT Agriculture Specialist 

For many vegetable growers in climate zones nine and warmer, like where I live in Louisiana, summer brings a familiar yet challenging routine. In May and June, those long sunny days and warm soils fuel vibrant growth. But July and August bring real heat, and suddenly it feels like we’re all moving in slow motion. Tomato pollen becomes infertile, peppers get sunscald, and beans struggle to breathe under high ozone levels.

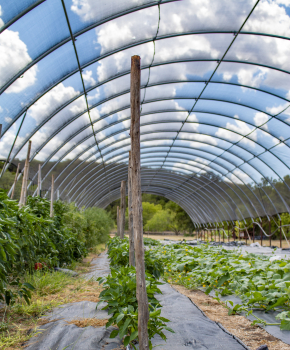
Two caterpillar tunnels at the VEGGI Farmers Cooperative, with sweet potatoes growing between them. Photo: Audrey Kolde

This seasonal slowdown is a natural part of the farm rhythm and even needed for certain farm goals like cover cropping, infrastructure projects, planning, or that vacation you need. But sometimes you may need to push a crop a bit longer, bridge a production gap, or protect sensitive varieties. That’s where shade becomes a useful tool. 

Though shade cloth has traditionally been used over greenhouses, this clever solution is making its way into open fields, offering an invaluable respite from the sun’s harsh rays. In the fields, the crops basking in too much sunlight can suffer from sunburn, absorbing more light than they can safely use, leading to heat exhaustion and even to their leaves “fainting” from the stress! 

Shade cloth can reduce solar radiation that causes these problems. The even light the net creates prevents overheating, flower drop, localized burn spots on peppers, and cracking on tomatoes when temperatures soar past 90°F.  

Making an Investment 

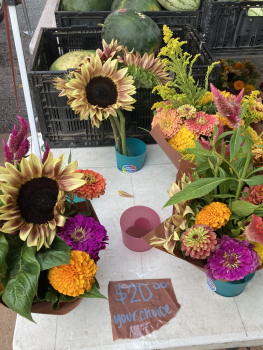
Now, before we get too excited, let’s talk about costs. Shade cloth can be an investment, with costs dependent on factors such as shading percentage, material, UV stabilization, and whether you opt for knitted or woven. For those covering large areas, costs can escalate quickly, especially when you factor in the necessary hardware, posts, and tensioning systems. But here’s the silver lining: the initial investment often pays off. When the scorching sun brings sunscald, blossom drop, bittering, and reduced fruit set, the economic losses can quickly outweigh the cost of shade structures. Even a minor reduction in plant stress can mean steadier yields, superior quality, and an extended harvest window, offering substantial returns during the most unpredictable parts of the growing season. 

When purchasing shade cloth, cut-to-length pieces work well for first-time users, small-scale growers, or trial runs, while bulk rolls are ideal for farms managing multiple blocks or constructing several shelters. Always seek suppliers who offer UV-stabilized materials, transparent warranty terms, and consistent mesh quality. A reputable supplier will also give you comprehensive specifications, including the actual shade percentage, expected lifespan, airflow properties, and whether the cloth is knitted (which tends to be more durable) or woven (stiffer but may fray). Because shade cloth is an investment, you’re better off using it for your highest-value crops that bring you the greatest return on investment.  

A Versatile Tool

When I first purchased shade cloth, my main goal was to cool down my greenhouse. However, it didn’t take long for me to recognize that my field needed it just as desperately. I explored which setups stood strong in the face of wind and were worth my efforts. What astonished me the most was the sheer versatility of shade cloth – it’s like a chameleon that adapts perfectly when paired with the right structure and crop. 

Shade cloth over a caterpillar tunnel frame protects vulnerable vegetables. Photo: NCAT

I began using shade cloth on low tunnels because I already had some hoops from my winter growing endeavors. This system revealed itself to be one of the simplest and most cost-effective options for shading crops in the field. With a little creativity, you can repurpose wire hoops, PVC pipe, or conduit bent into arches to create tunnels, draping the shade cloth directly over the top and securing it with sandbags, landscape staples, or snap-on clips. The beauty of this system lies in its accessibility; most growers already have the materials on hand, which helps keep costs low and waste to a minimum. However, it’s crucial to ensure proper anchoring and attachment, especially during high winds or sudden summer storms. A few sturdy clips and weighing down the edges can make all the difference in preventing the cloth from lifting or tearing.  

Low tunnels are particularly effective for crops like lettuce, brassicas, cucumbers, herbs, and young transplants. But they’re not without their challenges! One downside is that low tunnels can trap excessive heat when ventilation is restricted, which leads to stressed crops and increased humidity. The key is to use a lighter shade cloth, keep the sides open, and promote good airflow. In hotter climates, opting for lighter-colored or aluminized cloth can reflect heat, while darker cloth might trap it. And let’s not forget about tension! Loose cloth that flaps in the wind wears out quickly, so ensuring it’s snugly stretched over the hoops not only enhances durability but also stabilizes the structure.  

Suspension Systems 

Thinking bigger, I expanded to a suspension-style system that stretched shade cloth over multiple crop rows. This setup involved T-posts, bamboo, EMT conduit, and even 4” x 4” wooden posts along the bed edges. I strung paracord, wire, or greenhouse twine between the posts like clothesline. Achieving strong tension here is essential, and a ratchet strap proved invaluable for getting that perfect tautness. I found that upgrading to 10-foot T-posts provided the resistance I needed for this taller structure. Clipping and zip-tying the shade cloth to the frame resulted in a spacious, airy canopy that kept me cool while I worked beneath it.  

This design not only minimized costs by reusing existing materials but also excelled during afternoon showers, provided I anchored it properly! Deep-set posts, taut lines, and secure attachments are vital to withstand intense rainfall or sudden gusts. And trust me: hurricane winds and sail-like canopies are a recipe for disaster, so make sure to take it down when preparing for a big storm.  

This canopy-style shade works wonders for summer greens, peppers, tomatoes, ginger, and turmeric, due to its excellent ventilation. Inadequate airflow can raise humidity and increase disease risks. The main challenge revolves around maintaining tension. Sagging cloth can create pockets that trap water and wind, putting the structure at risk. Choosing the right shade percentage is crucial, too. If you overshade your crops, you risk hindering their photosynthesis when they need it the most. But with the right setup, this system stands out as one of the most efficient ways to shade multiple beds simultaneously.  

Another effective method is to stretch shade cloth directly over existing trellises. I found that laying shade cloth horizontally above trellis lines or cattle panels—angling it toward the west to buffer that harsh afternoon sun—works like a charm. Try this approach on tomato stakes, Florida-weave systems, and cucumber tunnels. For growers seeking a quick, budget-friendly way to protect sunscald-prone crops like tomatoes, peppers, and cucumbers, this is an excellent starting point.  

Nature’s Solution 

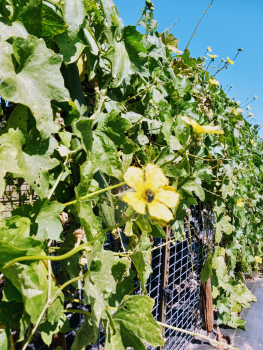
Luffa grows over trellises at Inglewood Farm, with lettuce (not visible) planted beneath. Photo: Audrey Kolde

Stratification, i.e., the natural layering of vegetation, creates cooler, buffered microclimates, which farms can utilize. This is why combining shade cloth with living plants has become one of my favorite agroecological strategies. I plant tall crops such as sunflowers, okra, sorghum-sudan grass, or trellised crops (my favorites are cucuzza, luffa, and cucumbers) to create a vertical, layered habitat that naturally cools the soil and protects sensitive crops. While these plants are growing to full size, I use shade cloth temporarily and then remove it once the living canopy takes over. Mimicking natural ecosystems on the farm can reduce your farm’s plastic use, but it requires close monitoring to avoid competition for water and nutrients. Living shade is particularly effective in mixed perennial-annual systems or on farms seeking long-term ecological resilience. Shade trees and agroforestry systems can provide a more permanent form of stratification, creating microclimate buffers while adding habitat and carbon storage.  

In addition to living shade, there are many other options for complementing or replacing traditional shade cloth. Greenhouses can achieve similar effects by painting the greenhouse with a limewash to diffuse sunlight, thereby reducing heat without adding physical structures. Some farmers experiment with natural-fiber materials like hemp cloth as biodegradable shading options. Drawing from all these tools, living systems, structural shade, and material alternatives, it is possible to design a shade strategy that supports both crop health and long-term farm sustainability. 

Related Resources

ATTRA Publication: Season Extension Techniques for Market Gardeners

ATTRA Blog: Agroforestry and Agrivoltaics: Two Appropriate Technologies for Smart Shade on Farms

This blog is produced by the National Center for Appropriate Technology through the ATTRA Sustainable Agriculture program, under a cooperative agreement with USDA Rural Development. ATTRA.NCAT.ORG.

By Chris Lent, NCAT Agriculture Specialist 

It’s a chilly morning in late March and the seedling house heater kicked on several times overnight to keep the plants happy. The skies are cloudy as you get the kids to the bus and run to the hardware store. On the way back to the farm after your errands, you notice that the clouds are gone, the strength of the late morning sun taking you by surprise after what had been a cool late winter. Oh no… the seedling house! You rush home to make sure your plants aren’t getting cooked.  

If you can relate to this scenario, it may be time to consider the benefits of automating the control points in your high tunnels and seedling houses. Those benefits include more consistent watering, less severe temperature swings, better production results, labor and energy savings, and better work-life balance.  

The tools and systems available for automation are many and varied. The size of your farm, business goals, and lifestyle goals can all help inform decisions on the type and level of automation to move toward on your farm. A good first step is to identify components in your high tunnels and greenhouses that can be automated. For example:

  • Heating (hot air units, boilers, hot water heaters)
  • Cooling (ventilation fans, pad and fan cooling units, A/C) 
  • Humidity control (fans, roll-up sides, ridge vents, fog) 
  • Air circulation (horizontal airflow fans) 
  • Irrigation (pumps and valves) 
  • Lighting 
  • Thermal control (shade, screens, thermal blankets) 

For many years, the default automation used in high tunnels and greenhouses on small to midsize farms relied on dedicated controls. Dedicated controls operate only one piece of equipment at a time. Examples of dedicated controls include in-line irrigation timers and individual thermostats for heating units or fans. These controls require monitoring and manual resetting as weather conditions change. 

Integrated control systems are a newer alternative to dedicated controls. These systems use feedback from sensors and electronic processing to control the frequence and sequence of equipment operation to keep a tunnel or greenhouse very close to temperature and humidity set points. Once installed and programmed, they work autonomously. Integrated controls can operate motors for roll-up sides, ventilation fans, and heating units cooperatively with little manual input.  

An integrated control system for heating and ventilating a seedling house on a farm in PA. Photo: Chris Lent, NCAT

Integrated automation systems can save costs in labor, decrease the risk of losing a crop, and save energy. There are many brands and styles of integrated control systems, so it can be time-consuming to search for the best option. If you have an established relationship with a trusted greenhouse supplier, they can help guide decisions on DIY automation projects.  

Previously, it was primarily large-scale producers who used these kinds of systems, but there are now companies that offer design and installation guidance for smaller scale integrated automation systems. Some brands have screens on the equipment to enable the user to enter set points, while other brands rely entirely on Wi-Fi and a device app for user interface. These systems can range in price between $2,000 and $4,000 per tunnel or greenhouse depending on the complexity and the brand of the system. Some companies also lease system components to the farmer and will automatically replace parts of the system if they fail. This lowers upfront costs and decreases hassle for the farmer.   

Fully integrated systems are something to aspire to, but most growers automate irrigation control and temperature and humidity control separately. For irrigation, a good example of a dedicated control is the simple, low-cost ($10 to $20) controls for irrigation in the form of in-line timers. You can purchase these from greenhouse supply companies, but garden centers and hardware stores also usually carry some version of these devices. They allow you to set an irrigation line to water for a certain amount of time, then automatically shut off.  

A dedicated in-line irrigation timer requires manual setting for each watering event in a tunnel. Photo: Chris Lent, NCAT

Battery powered digital programmable irrigation timers are available as well and can be sized to the irrigation line. These can cost from $100 to $150 for control over a single irrigation zone but give the grower much more control, and once programmed, they can give you freedom from the task of turning water on and off manually. Multi-zone digital controllers allow growers to control multiple valves in a more customized irrigation system.   

Some tips to keep in mind for automation: 

  • Assess the need first: Count the number of heating, cooling, and ventilation units you will need to control and estimate the cost to manually control these. 
  • Get advice and pricing from greenhouse suppliers and companies that focus on greenhouse automation. 
  • Get quality sensors with solar guards and place them near the crop. 
  • Install an ambient air and soil monitoring system to monitor all growing conditions and send notices to your phone. 
  • Consider installing camera monitors so you can visually check conditions in a tunnel or greenhouse on your phone. 
  • Make sure your infrastructure is compatible with the automation system you want. Does it require electricity and reliable internet to work? 

Automating the environmental controls in high tunnels and greenhouses can improve productivity and give some freedom from everyday tasks, but it doesn’t mean growers can become Ron Popeil and “set it and forget it.”  Frequent visits to monitor high tunnel conditions and the health of a crop are still necessary. However, being able to rely on automatic control systems to manage conditions in a tunnel or greenhouse and being able to check those conditions and receive alerts from anywhere gives peace of mind when you decide to step off the farm.   

Ultimately, choosing the right level of automation is about finding a balance that supports both your crops and your daily life. Whether you start with a few dedicated controls or invest in a fully integrated system, each step toward automation can reduce stress, protect your plants, and make your operation more resilient. Automation systems can’t fully replace a grower’s attention and experience, but they can serve as a reliable partner in maintaining optimal conditions, preventing costly mistakes, and creating more time for the many other demands of running a farm. 

Related ATTRA Resources: 

Season Extension Techniques for Market Gardeners 

Sustainable Season Extension: Considerations for Design 

Purchasing and Siting a High Tunnel to Extend the Growing Season 

Organic Greenhouse Vegetable Production 

Additional Resources: 

Greenhouse and High tunnel suppliers: 

High Tunnels Supplier Directory – HighTunnels.org 

Integrated automation companies: 

Link4 Controllers | Link4 Controls 

Orisha | Get Your Tomato Yields Up! 

Agrowtek Inc. :: Grow Controls for Greenhouses, Hydroponics & Indoor Growing

This blog is produced by the National Center for Appropriate Technology through the ATTRA Sustainable Agriculture program, under a cooperative agreement with USDA Rural Development. ATTRA.NCAT.ORG.

By Nina Prater, NCAT Agriculture Specialist

“When you pass through that gate, get as close to the left post as you can. You’ll feel like you’re gonna tip, but you won’t.”

Those were the comforting instructions my husband Jeremy gave me during our recent tractor-driving lesson. We have been farming together for 18 years, raising a variety of livestock on his family’s farm in the Ozark Mountains of Arkansas. We are keeping the operation simple these days—he and I have a small herd of meat goats, and my father-in-law has a small herd of cattle.

In all these years, I’ve only ever driven the tractor one time. With back wheels almost as tall as I am, I found the tractor intimidating. During the pandemic we talked about how I should learn how in case everyone else got sick and I needed to feed the cows their hay, but we never got around to doing anything about it. With our two children to keep up with, we somehow found ourselves falling into heteronormative gender roles without meaning to.

But on a sunny, breezy afternoon this February when I joined him to do chores (mainly so I could ogle the new baby goats) he asked, “Do you want to drive?” And without hemming and hawing, I said, “Sure!”

I think because we hadn’t planned this tractor lesson ahead of time, I didn’t have time to worry or put up any mental barriers that might have held me back. I just said a quick yes and suddenly I was in the driver’s seat learning the gears, which levers did what, and how to operate the front hay spike and the back haybale unroller attachment.

The author during her first lesson on a tractor with hay-feeding attachments on the front and back. Photo: Jeremy Prater

Jeremy is a patient teacher. He coached me as I reversed out of the barn, allowing me to get a feel for the way the tractor steers, how the clutch feels, and how to maneuver something significantly longer than my sedan.

He took the process one step at a time. First, we’re going to go through this gate. Then the next gate (for once, I wasn’t the gate-opener!). Then we’re going to spike a round bale, move it out of the fenced area where we keep the hay, and set it down. Then I was going to back up to the bale and operate the bale unroller to stab it right in the center. Then I had to get through the wonky gate mentioned above to get to the paddock where the cows were that day.

Once through the wonky gate, he took the net wrap off the bale. The cows started ambling over, eager for fresh hay. He showed me again which lever to use to set the bale on the ground and then I drove forward, allowing the hay to unroll in a long strip behind me.

He talked me through each step of the process, joking to keep me relaxed and never once making me flustered. He didn’t make me feel bad for not knowing something already that is obvious or easy for him.

For Jeremy, unrolling hay for the cows is a mundane task that doesn’t require a whole lot of thought. He’s done it countless times before. For me, unrolling that bale of hay felt like a triumph. I overcame the chorus of naysayers in my head telling me, “You can’t drive something so big, you’re too small,” and, “You’re going mess up and break something,” and, “You’re going to look like you don’t know what you’re doing.”

I did look like I didn’t know what I was doing, because I didn’t know what I was doing. But part of learning is being unafraid to be a beginner. And a big part of being unafraid to be a beginner is to be in an environment with a teacher who makes you feel safe. Physically safe in the case of learning to operate heavy equipment, but also safe to ask questions, safe to make mistakes, and safe to celebrate small victories. I’m grateful to have a spouse who can teach me new skills in this way. He stays calm, he takes it step by step, and he explains both the how and the why, so I fully understand the processes.

Having spent almost ten years working at NCAT and spending a lot of time collaborating with my colleagues around the country, I can confidently assert that all our agriculture specialists exemplify this approach to teaching as well. If you call us up on the ATTRA phone line, someone is going to answer who will help you with patience, curiosity, and kindness. If you go to one of our workshops or webinars, the NCAT specialists will share their expertise and answer questions without making anyone feel bad about not knowing something already. We are here to meet you where you are without judgement and help you build your skills and knowledge so you can be the best farmer or rancher you can be.

When I got home from chores, I told my teenaged daughter that I drove the tractor and fed the cows, to which she replied, “That’s so diva!” (high praise in teen-speak). So, if you’ve been hesitating to be a beginner at something, I encourage you to take a leap of faith. It felt really good at the end of the day to have pushed myself out of my comfort zone to learn a new skill. And if my teenager thinks it’s cool… I call that a double win.

Related ATTRA Resources

The Case for Tractor Farming

Equipment and Tools for Small-Scale Intensive Crop Production

Maintaining Your Tractor: Videos

This blog is produced by the National Center for Appropriate Technology through the ATTRA Sustainable Agriculture program, under a cooperative agreement with USDA Rural Development. ATTRA.NCAT.ORG.

The House Agriculture Committee has passed its version of the Farm Bill. It includes some positive biochar provisions but also has a critical omission.

The bill does not include the bipartisan Biochar Research Network Act, which authorizes the USDA Agricultural Research Service to establish a large multi-site research project to close critical knowledge gaps on agricultural use of biochar. Research results on biochar have been promising, demonstrating that biochar can improve soil health, increase soil water holding capacity, enhance fertility, reduce soil acidity and improve yields. But research results have been inconsistent because diverse types of biochar have been tested in varying soils and conditions.

The Act would establish a multi-site national research project to test a common set of biochar types with standardized characteristics across multiple locations with varying conditions. The research would help sort out which biochar types have promise for varying cropping systems, soil types and climates. The research would measure effects on soil health, fertility, biological activity, organic matter and water holding capacity, as well as plant growth and crop yields.

Findings of the research would be used to inform farmers on which biochar types can be helpful in their soils and cropping systems.

We are working to ensure the Act is included in the Senate version of the Farm Bill when that is taken up, and the final Farm Bill produced by a conference committee of House and Senate committee members.

The Forestry Title of the House Bill does have some positive provisions on biochar. It would support development and commercialization of biochar by establishing demonstration and research projects in each region of the US Forest Service and US Bureau of land Management.  The projects would be targeted to forested areas with elevated risk of wildfire and get at least half of the biochar feedstock from forest thinning and management.

It is uncertain whether a Farm Bill will be completed in this Congress. Legislation often stalls in election years. If the Farm Bill stalls, the new Congress will need to start anew in 2027 after the election.

We’ll keep you informed.

By Lee Rinehart, NCAT Agriculture Specialist 

Mike Miezianka and Ray Smith have found a way to beat the average Long Island commute time by almost seventy-five percent. They take a boat. After a fifteen-minute crossing of Great South Bay, their workplace materializes on the horizon: a series of floating cages in discrete rows covering an acre and a half of the estuary. We have arrived at Toasted Oysters Farm, one of twenty-three similar operations scattered across this shallow part of the bay that grows the region’s distinctively flavored Blue Point Oysters.

Rows of black floats sit on silver water, a pink and orange sunrise behind.

The morning commute. Photo: Lee Rinehart

The journey to Toasted Oysters Farm really began five years earlier, back in 2020. Mike was hanging with Ray in Ray’s backyard, sharing after-work drinks, and the conversation turned speculative, as often happens when long-time friends gather to let the day settle. “I’m going to own an oyster farm,” Ray said out of the blue. I can imagine Mike’s look of curiosity, and Ray’s grin as he sat across from him, sipping his drink. The idea of farming oysters was nothing new to either of them. Ray had been taking a class on oyster farming at the township, but something was different as they sat together that day. That day, there was intention. So, Mike signed up for the next oyster farming class and the die was cast. What would follow over the next five years was a journey that Mike, a Navy veteran and former New York City detective, and Ray, a paramedic, could never have anticipated before that fateful day in Ray’s backyard. 

When Mike, Ray, Luke (their summer employee), and I reached the farm the morning they took me out, the sun was balanced on the horizon, bathing the sky salmon as Ray throttled the engine down. The cages, supported by black plastic floats and each holding six oyster bags, bobbled gently in the current, longlines holding them in place, anchors at the end of each row. A converted pontoon boat lay anchored alongside the last row of cages, tethered to a floating pier. Together, they served as boat dock, staging zone, oyster sorting area, and packing house. Ray brought the boat alongside the floating dock and our workday began. 

A man stands looking at a metal tumbler used to sort oysters by size.

The tumbler Mike and Ray use to sort oysters by size. Photo: Lee Rinehart

Oysters start from seed (yes, seed… small, shelled creatures ranging from one to ten millimeters in diameter) in semirigid mesh bags. In March, Mike and Ray place the bags into floating cages where the oysters will grow rapidly, with an average of eighteen months between planting and harvest. Growth peaks in the summer months when the water temperature is warm and nutrient flows are abundant. Each day during the summer Mike and Ray work the farm, pulling bags from the cages and sorting them in a homemade tumbler, an ingenious device that looks like an oversized potato washer with holes along its surface that allows the oysters to fall into buckets underneath based on their size. After they sort the oysters to size, those that need more growth go back into bags and into the floating cages, and they rinse, bag, and ice the marketable oysters. The process continues all summer. Maintenance tasks such as de-fouling gear, repairing cages, or adjusting longlines also keep them busy throughout the growing season. Then, finally, the fall brings a lull in activity. After their last time sorting, Mike and Ray bag the remaining oysters, lay them on the bay floor to overwinter, and then haul the floating racks back to land, protecting the gear from ice damage. 

Once we were tied to the floating dock, Ray and Luke, a college biology student whose work pace never slowed all day, immediately got busy with the tumbler while Mike and I descended the boat’s stern ladder into the seventy-nine-degree water of Great South Bay. There are probably as many ways to access oyster cages as there are oyster farms, and on Mike and Ray’s farm all the oyster handling and maintenance is done by wading out into the bay’s waist-high water. A terrestrial farmer has an advantage in that they can walk easily between rows, drive tractors, or listen to a podcast while working. But an ocean farmer, well, try spending a seven-hour workday walking against an ever-increasing tidal current while manipulating oyster bags into and out of chest-high floating cages. Nothing is lashed down, and everything moves, all the time. And while land farmers may be on constant lookout for snakes and spiders, an attentive oysterman is on vigil against the painful defensive pinches of the blue crab, which finds the aquatic plants that colonize the floating cages to be ideal habitat.  

Mike says the demand for seafood is forecasted to increase by 25% from 2024 to 2032, and to cater to consumers’ greater awareness of the benefits of eating locally produced food, Toasted Oysters has adopted a system of traceability through inventory tracking and harvesting software that accurately pinpoints the location of each harvest. They market their oysters to distributors in the Long Island region thanks to the strong relationships they’ve developed with buyers. This year they are expanding into New Jersey, Pennsylvania, and Massachusetts, with a goal to increase their inventory to three million oysters by the end of 2025 to keep up with demand. In addition to distributors, Mike and Ray supply four restaurants, diversifying their distribution channels and enhancing their brand presence among people seeking the briny, savory flavor that distinguishes Blue Point Oysters from other varieties.

Black floating cages lined up in rows on the water.

Floating cages at Toasted Oysters Farm. Photo: Lee Rinehart

We’d been on the farm since five-thirty a.m., and as the clock approached noon the tide increased, and walking to and from the cages became a laborious push against an even deeper aqueous surge. As Mike and I handed the bulging bags of oysters up to Luke on the floating dock, we decided it was time to sort the marketable oysters, get them on ice, and call it a day. Mike and I had been talking all day as we worked, about the ecological benefits of filter-feeding shellfish, how heavy rainfall events can temporarily shut down an operation, what to look for in a marketable oyster, and the various practices and communal nature of the close-knit oyster farmer community in the bay. Then our conversation turned toward the pragmatic: I wanted to know his recommendations for beginners.  

There are so many moving parts on a shellfish farm: site selection, leasing, regulations, choosing the right equipment, marketing, and acquiring production knowledge. When Mike started out, before he even had a lease, he volunteered on oyster farms to learn the craft. “Farmers are always looking for assistance,” Mike said. Getting out and working on farms acquaints you with the rigors of a normal workday. You get firsthand knowledge of systems and techniques – like which kind of cage system to use depending on water depth, how to install anchors and longlines, what to do about biofouling on cages and cormorants and gulls pooping on your gear.  

If you catch the shellfish farming bug, then it’s time to research the available aquaculture lease sites and regulations in your area. “On Long Island,” Mike explained, “several entities manage different regions, each with its own specific rules and regulations, in addition to state regulations.” This is one of the benefits of volunteering on farms. You forge a relationship with an established farmer (who may end up being your neighbor) and you can get firsthand information on leasing and regulations.  

Volunteering is essential for learning the trade. As Mike noted, “In oyster farming, the motto is: ‘More flow, more grow, more dough.’” Good water flow is essential for delivering nutrients to your oysters and is the principal consideration in site selection. And finally, Mike recommends you “consider how the farming technique aligns with your current physical abilities. Farming in deeper water requires a larger boat and additional equipment. Conversely, in shallow water, you may need to physically roll cages for anti-fouling measures and navigate walking in tidal currents.” 

A man in a hooded jacket steers the boat away from the floating cages of the oyster farm.

Mike steers the boat away from the oyster farm at the end of the day. Photo: Lee Rinehart

Mike and Ray are proving that small-scale oyster farming can be a viable business, as they are at a point now where they are scaling to a level that will provide a sustainable income. For those who would begin the journey to having their own oyster farm, or any kind of farm for that matter, Mike’s words are salient: “Begin with small steps and maintain a big vision.”  

 Related Resources 

ATTRA Podcast: Farming Oysters with Mike Miezianka

Ocean Farming: a Conversation with Bren Smith 

Further Resources 

Toasted Oysters – Authentic Blue Point Oysters 

Cultivating the Eastern Oyster, Crassostrea virginica 

Report: State by State Summary of Shellfish Aquaculture Leasing/Permitting Requirements (2021) 

Rhode Island Shellfish Marketing Guide 

By Danielle Duni, NCAT Agriculture Specialist 

Whether you have ten sheep or one thousand, proper preparation, handling, and storage of wool can significantly improve the value of your wool clip. When you take steps to produce clean wool, you open the door to better pricing and more opportunities for processing into finished products.

One of the biggest factors affecting wool quality is contamination, which can come from livestock paint, feed, grass seed, baling twine, net wrap, and many other sources. The good news is that there are several steps you can take long before shearing day to reduce contamination and protect your wool quality. You should start making plans for your next clean wool clip shortly after your previous shearing is complete. Keep reading for ways to keep your wool clean from a range of contaminants. 

Sheep Paint 

Many operations shear their sheep before lambing to create a cleaner environment for the birth and to make it easier for lambs to latch onto the ewe. Larger operations often use paint brands to be able to identify ewe and lamb pairs once they’re in the pasture. When you apply paint, use a scourable sheep paint, which can be removed during the wool-cleaning process. Apply paint sparingly and place it consistently within the flock, high on the hind end where it can be easily removed on the shearing floor. Careful placement helps prevent unnecessary contamination of the fleece. 

Synthetic net wrap can contaminate wool if not removed and disposed of. Photo: NCAT

Synthetic Fiber

Feeding practices can also play a major role in wool contamination, especially in confinement settings. Taking the time to remove all net wrap and poly twine from feed and properly disposing of it goes a long way. Additionally, refrain from using twine to hold up posts of gates; twine is made from poly fibers that break down into smaller strands and eventually find their way into the wool. Poly fibers cannot be combed out in processing, resulting in an unusable yarn.  

Feed Particles

Using proper sheep bale feeders helps reduce the amount of time sheep spend climbing into feeders (though anyone with sheep knows they will always find a way). Feeding daily rations instead of allowing continuous access to feed can reduce contamination, although it does require more labor. If you are spreading feed or bales with a tractor or wagon, it is best to keep sheep penned away while spreading to prevent fine feed particles from settling into the wool.  

It’s Shearing Day! 

Speaking from experience, you can never be too prepared for shearing day. The number one priority is keeping sheep dry. A good rule of thumb is this: if you place your hand on top of the fleece and it feels even slightly damp, the sheep are too wet to shear. Moisture can clog shearing equipment, ruin the wool clip, and create unsafe or uncomfortable conditions for the shearing crew. Even a light rain or snow can delay shearing just as much as a major storm. 

Shearing Set-Up 

With larger flocks, shearing crews often bring wool help, i.e., an experienced crew to help with the wool handling and preparation aspect of the shearing process. If you only have a few sheep and no wool help, congratulations, you are the wool help!  

Shearing crews also often bring equipment such as wool packs, wool sweeps, and skirting tables. At a minimum, have proper wool bags and a broom on hand. Wool packs are the industry standard for baling and storing wool and can be purchased online. If a wool sweep is not available, a clean shop broom works well for clearing debris from the shearing area.  

Skirting involves removing undesirable wool such as wool that is contaminated with manure, paint, heavy vegetable matter, dirt, or short fibers. The key is to separate lower quality wool from the main fleece. A skirting table provides the best results when removing bellies, tags, and contaminated pieces from the fleece. Skirting involves removing undesirable contaminants from wool such as manure, paint, heavy vegetable matter, dirt, or short fibers. There are many effective DIY skirting table designs available online. If a table is not feasible, you can skirt directly on the shearing floor. The key is to separate lower quality wool from the main fleece. Additionally, laying down a canvas tarp in the shearing area helps keep wool clean and off the ground. 

Sorting Wool 

After skirting comes sorting. Best practice is to have separate bags ready for the main fleece line and off-sorts such as bellies, pieces, and tags (often grouped together). If the main fleece varies in quality, you can split it into an AA (highest quality) line and an A line. Even if you have limited experience with wool sorting or classing, the important take away is to sort “like wool with like wool.” Shorn belly wool goes into the belly bag. Areas of contamination, such as the crow’s nest/top knot or painted wool, go into the pieces bag. The main fleece goes into the mainline bag, taking care to remove short fibers or weak samples that break easily when pulled. (For more on fleece anatomy, check out this article from New Mexico State University). Compost or discard wool from the hind end with manure contamination, as it can add moisture to the bales. The main fleece goes into the mainline bag, taking care to remove short fibers or weak samples that break easily when pulled.  

When sorting, it’s helpful to pull a sample from the fleece to evaluate quality. Measure length against your hand, with a general minimum of three inches. Test strength by gently pulling the staple apart to check for breaks. If your flock includes colored fiber sheep, shear them last to prevent contamination of white wool. 

Danielle Duni sits atop bales of wool that are sorted and ready for market.

Baling Wool

Once sorted, it’s time for baling. Some shearing crews bring hydraulic wool balers that compress wool into 400-to-500-pound bales. The wool packs (bags) are then securely fastened to keep the wool clip protected.  

Labeling and Storage 

And don’t forget the final step: labeling! Industry standard labeling guidelines can be found through the American Sheep Industry Association. At a minimum, each bag should include the operation name, bag number, wool description (mainline or off-sorts), and year. Store wool in proper wool packs in a dry area. Storing bales on pallets helps prevent moisture absorption and allows for airflow. Ideally, wool should be stored indoors in an area with moderate temperature fluctuations. 

Shearers Know Best 

One of the best resources you have is your shearer. Ask what you can do to set up the area for success. A pen with an alley run is a great starting point. Keeping the shearing area clean is essential. Lightly watering the barn floor beforehand to prevent dust can help conditions be ideal. Shearers might have other tips like that to make sure the shearing goes smoothly and the wool clip is the best quality possible.  

This blog is just an overview of preparing for sheep shearing. For more information, please reach out to our NCAT agriculture specialists at askanag@ncat.org. Additionally, the American Sheep Industry (ASI) provides great resources for how to prepare, sort, handle and store the wool clip. Find some of their resources below.  

Resources:  

Preparation Steps for Wool Quality Improvement
https://www.sheepusa.org/wp-content/uploads/2021/11/Prep-Steps-Brochure-Small-Size.pdf  

Wool Contamination: American Sheep Industry Association, Inc. 
https://www.sheepusa.org/wp-content/uploads/2022/06/Wool_contamination-1.pdf  

Poly Contamination: American Sheep Industry Association, Inc.
https://www.sheepusa.org/wp-content/uploads/2022/06/Poly-1.pdf  

Understanding Wool Grads: New Mexico State University
https://pubs.nmsu.edu/_b/B409/index.html

Code of Practice for Preparation of Wool Clips 
https://www.sheepusa.org/wp-content/uploads/2021/11/code-of-practice-2021.pdf  

Wool Handling Videos (for purchase): American Sheep Industry Association, Inc.
https://www.sheepusa.org/product/wool-handling-videos  

This blog is produced by the National Center for Appropriate Technology through the ATTRA Sustainable Agriculture program, under a cooperative agreement with USDA Rural Development. ATTRA.NCAT.ORG.

By Danielle Duni, NCAT Agriculture Specialist

The birth of baby lambs, kids, and calves—what a special time of year! It’s what producers prepare for all year long. Beyond the fall paycheck, the real reward of ranching comes from watching a newborn lamb, goat, or calf stretch out for the first time and take those wobbly steps, then trail faithfully behind its mother.

Danielle Duni holds two young lambs.

Still, amid those heartwarming moments lies the reality of long days, sleepless nights, and tough decisions. Preparation can make all the difference, easing the pressure and setting the stage for a successful season. The best way to be ready is to ensure your facilities, nutrition program, and supplies are all in order. Facilities don’t have to be elaborate, just functional, with a space to hold expectant mothers that are about to lamb/kid/calve, a few jugs (i.e., mothering pens), and an area to sort animals when needed.

The main factor that will make or break the birthing season is the nutrition received by the mother during pregnancy and lactation. This subject is beyond the scope of this blog, however. Your local Cooperative Extension Service will have resources regarding nutrition that incorporate locally available feedstuffs. Check your flock or herd’s body condition and aim for moderate condition (not fat, not thin) during pregnancy. We can provide more information on nutrition upon request at askanag@ncat.org.

It’s amazing how even with all the planning in the world, each lambing, kidding, or calving season still manages to surprise you. Maybe it’s a ewe that decides to lamb at two a.m. during the coldest cold snap of the year, or a calf that needs a little extra encouragement to nurse. Those moments remind us why it’s so important to have everything ready and within reach. When things get busy (and they always do), being organized and prepared can make the difference between chaos and calm.

Here are some sample supply lists of materials and equipment that can help make lambing and calving go more smoothly. It is important to note that the sample list is an extensive list of supplies that could possibly come in handy. Most of these supplies can be gathered over time, and each operation will learn what works best for their situation.

*The asterisk denotes basic items that are nice to have when getting started.

Lambing, Kidding, and Calving Supplies

Pen Set-Up and Cleaning Supplies

  • Straw or bedding material*
  • Water and feed buckets*
  • Extra panels for pens
  • Lime for pen sanitation
  • Bedding fork and shovel*
  • Broom
  • Wheelbarrow
  • Garbage cans and trash bags
  • Designated disposal area for afterbirth and dirty straw

Supplies for in the Pen

  • Alfalfa pellets or good-quality hay*
  • Head catch (to secure stubborn ewes and assist in lamb bonding and feeding)
  • Heat lamps* (babies may arrive during cold weather)
  • Replacement bulbs for heat lamps
  • Extension cords*
  • Wire or carabiner (to secure heat lamps and prevent heat lamps from starting straw fires)*

Supplies for Assisting the Birth

  • OB lubricant (or mild dishwashing soap)
  • Long OB sleeves (arm-length gloves) (important to protect from zoonotic diseases)
  • Calf/lamb puller
  • Clean towels or rags for drying lambs*
  • Prolapse harness or spoon
  • Prolapse needle (to sew prolapses)
  • Umbilical tape (to tie thick umbilical cords or sew prolapses)

Fresh calf in a warm pen sporting a shiny new ear tag.

Supplies for Processing Lambs, Kids, and Calves

  • Elastrator bands and banding tool (for docking tails and castrating)
  • Paint marker for tags
  • Ear tags and tagger
  • Scissors (to trim umbilical cords)
  • Betadine or iodine (used to dip umbilical cord)
  • Umbilical dipping cup (filled with betadine—an empty pill bottle works well)
  • Scale for weighing lambs/kids
  • Record sheets or notebook along with pens/pencils*
  • Livestock paint – spray or paint bucket (to mark mothers and their babies)
  • Paint numbers (numbers can be stamped on livestock to identify pairs in the field)
  • Paint brand (necessary in larger operations to identify owner)

Supplies for Supplemental Feeding

  • Bottles with spare nipples*
  • Colostrum replacer (to use within first days of birth)*
  • Milk replacer*
  • Hot water supply (for mixing milk replacer)*
  • Stomach tube (for lambs, kids, or calves not taking a bottle)
  • Measuring cups and spoons

Supplies for Veterinary Medicine

  • Gloves
  • Needles and syringes
  • Sharps container
  • Drugs and dosage information
  • Thermometer
  • Solution
  • Antibiotic spray or powder
  • Electrolyte solution (for dehydrated lambs/kids/calves)
  • Energy drench (e.g., Nutri-Drench) (for lambs/kids/calves needing a boost)

Ensure supplies are stored in an easy-to-access location. Pro tip: make sure milk replacers are stored in a cool, dry, mouse-proof location.

Not mentioned in this list are the necessary drugs and dosages for treatment, as that information requires veterinary oversight. Always make sure to have established care with a vet before lambing and calving season. This article from Texas Tech University provides guidance on when to call your vet during calving, lambing, and kidding season.

At the end of the day, no matter how many seasons you’ve been through, each year brings its own set of lessons and little victories. Being ready with the right nutrition, setup, and supplies helps take some of the stress off so you can focus on what really matters, caring for your animals and appreciating the new life on the ground. It’s hard work, but it’s the kind that fills your heart and reminds you why you do it year after year.

ATTRA Resources:

Masterful Management in Lambing Jugs – ATTRA – Sustainable Agriculture

Top 5 Lambing Hacks for a Panic-Free Season  – ATTRA – Sustainable Agriculture

Lambing, Kidding, and Calving on Pasture – ATTRA – Sustainable Agriculture

For a Safe Lambing Season, Make a ‘Lambulance’ – ATTRA – Sustainable Agriculture

Healthy Animals, Happy Farm: Strategies for Sheep and Goat Care – ATTRA – Sustainable Agriculture

This blog is produced by the National Center for Appropriate Technology through the ATTRA Sustainable Agriculture program, under a cooperative agreement with USDA Rural Development. ATTRA.NCAT.ORG.

By Mike Lewis, NCAT Agriculture Specialist 

The forest is not merely a backdrop for raising pigs in silvopasture. The forest is a living partner in the cycle of growth and renewal. When pigs are raised thoughtfully among the trees, they become agents of fertility and soil health, creating a balance that benefits the animals, the trees, and the land. This balance isn’t a given, though – it requires intention, observation, and a gentle hand to maintain.  

Pigs should ideally be moved every three to seven days to prevent over-disturbance that can cause soil erosion, compaction, and overgrazing. Fencing is one of the most important tools required for this practice. Portable electric fencing—made of polywire or mesh netting, supported by step-in posts—allows farmers to move pigs quickly and safely. A well-maintained fence that delivers a reliable charge of 6 Joules or more encourages pigs to respect boundaries, keeping them within the paddock and protecting sensitive areas.  

Moving pigs from one paddock to the next isn’t as hard as it might seem at first. Leaving paths or corridors between paddocks helps reduce stress and builds trust in animals during moves. A simple trick is to carry the feed bucket when moving pigs—this familiar sound will encourage them to follow calmly. 

Electric fence in the foreground in front of a grassy forest floor.

Forest where pigs have grazed that has been allowed to rest and recover. Photo: Nina Prater, NCAT

Rest periods for paddocks, typically between 30 and 90 days to allow forages to fully recover, allow the forest floor to regenerate. Wetter or more fragile soils may require longer rest periods. Walking the paddock before turning pigs in provides valuable insight into whether the ground is ready or needs more time.  

Appropriate stocking rates will help maintain a balanced silvopasture system. A general guideline is to stock between 10 and 20 pigs per acre in a rotation system, but this varies based on tree density, soil type, and forage availability. Observing the ground after a rotation will allow you to assess if the stocking density is appropriate; if leaf litter remains intact and fungi are still visible, the pressure on the land is likely well-managed.  

It is best to err on the side of understocking, as it is easier to build up a system than to repair overused ground. It is also important to avoid farrowing pigs in the rotation paddocks, as sows and piglets need stable, sheltered areas with minimal disturbance.  

Protecting the trees themselves is vital. Young saplings are especially vulnerable and will benefit from wire mesh guards or rigid tree protectors to prevent pigs from chewing on bark or rubbing against the trunks. A single pig can uproot a small oak sapling in minutes, so take measures to protect your future forest. Also take care to avoid compaction around tree roots, especially after rain. Rotating pigs away from these sensitive areas during wet conditions preserves root health and prevents long-term damage.  

Timing moves to suit soil conditions is a practice rooted in respect and care for the land. Wet or saturated soil is very soft, and grazing pigs on it can lead to soil compaction and erosion, damaging both pasture and the forest understory. When the soil dries and firms, pigs can safely root and disturb the leaf litter, helping to clear invasive plants and cycle nutrients back into the soil without causing lasting harm. 

One pig eats from a blue trough in the foreground, and a farmer pours feed to two more pigs in a second trough in the midground, with a forest in the background.

Feeding pigs in portable troughs helps reduce excessive soil disturbance. Photo: Nina Prater, NCAT

Feeding management supports both pig health and land stewardship. While pigs will forage widely on acorns, roots, and greens, supplemental feed is necessary to reach market weight efficiently. Feed balanced rations, including grains or fermented feeds, in a way that encourages natural behavior and spreads manure evenly. Using portable feeders will allow you to move feeding sites around the paddock, which help limit the creation of wallows or overly concentrated manure piles. Seasonal mast like acorns and hickories offer rich forage, but it is important to limit pig time in these areas after the pigs have feasted to allow trees to recover from trampling. Monitoring the pigs’ body condition throughout the rotation is key. Pasture-raised pigs may grow more slowly than confined animals, but their meat often develops a richer flavor and firmer texture.  

Above all, raising pigs in silvopasture is a practice of attentive observation and adaptability. No single plan fits all seasons or sites. Successful farmers walk their land daily, watching rooting patterns, monitoring tree health, and noting soil recovery. Keeping a simple journal with observations and adjustments helps build a deeper understanding over time. Managing a regenerative pig enterprise in the forest is not about control, but cooperation. It’s a dialogue between steward and land, where both pig and tree flourish.  

In the end, silvopasture invites the producer to foster an approach of patience and respect. When managed with care, pigs do more than grow; they become part of the story of soil and tree, of land renewed and bounty shared. Through this work, farmers honor not only the meat they harvest but the living, breathing landscape that sustains them.  

ATTRA Resources:

By Eric Fuchs-Stengel, NCAT Agriculture Specialist

Back in the olden times, hardscrabble beekeepers worked their hives in the hot sun with no suits or gloves. They would puff on cigars, blowing smoke up around their faces, filling the air underneath their wide-brimmed bee veils. This smoke would keep bees, either defensive or curious, away from their upturned mustaches, long beards, and sunbaked faces. Meanwhile, these old-timers would work methodically, gently squeezing the bellows of their copper smokers, floating a thick gray smoke, often a mix of burning pine needles and wood chips, into their Langstroth beehives.

Two people stand on either side of a Langstroth beehive, one of them holding the lid while the other applies smoke to the hive.

Two beekeepers applying smoke to a Langstroth hive. Photo: Eric Fuchs-Stengel

The smoke served (and continues to serve) many functions: it distracts the bees, confuses their olfaction system (smell and pheromone communication), and signifies the potential of an incoming forest fire. The simple practice of using a smoker goes all the way back to ancient times and is still a cornerstone of modern-day beekeeping. Modern beekeepers may have lost the cigars and the outlandish facial hair, but the smoker remains in both copper, stainless steel, and aluminum forms and is a symbol of sustainable, productive, and successful beekeeping.

When I was a brand-new beekeeper, my local bee club partnered with a remarkable bee mentor who rarely used a bee smoker. She was extraordinarily successful with her hives, stewarding many through Varroa mite infestations and cold winters. She prioritized moving slowly and thoughtfully, with movements that were not jarring or alarming to bees. I have not seen this slow and steady “Tai Chi” style of beekeeping replicated anywhere else in the beekeeping world. She would on occasion use smoke, but it was rarely needed when she worked her mature, well-aged, well-mannered, and “spiritually connected,” hives in her home apiary. On a beautiful, sunny, summer day, I would watch my mentor slowly opening, inspecting, and working the hives with her bare hands—no smoker lit, no fear at all, and no defensive hives stinging and buzzing her in the face. Truly, a sight to behold.

As an inexperienced beekeeper, I thought this was the way I should begin raising my bees, which brings us to our story. For several years I kept my colonies on a horse farm. My mentor would visit me and wear a bee suit with no gloves so that she could feel what was happening in the hives and to what extent she was jostling the frames around. The bees were calm and peaceful around her. She was a master of this practice. I, on the other hand, was extremely nervous. I wore a full bee suit, thick leather gloves, and sweated profusely every time I worked my hives in the sun. The smell of my stress radiated outward, and my sweat soaked into the suit, which I did not really wash. In an attempt to imitate my mentor, I did not use a smoker. I would try to be gentle. Slow. Steady. But the fully aware, undistracted-by-smoke, energetic bees would BUZZ LOUDLY and swarm around my face covered by my bee veil. This would lead to me crushing bees under my fingers with the thick leather gloves, jarring and jolting frames as I removed them from the colony.

Diagram of the parts of a Langstroth hive, showing from top to bottom the outer cover, inner cover, medium honey super, deep hive body, and bottom board.

Basic anatomy of a Langstroth hive. Source: Jason Nelson, 2008.

In the heat of summer, I would struggle lifting off the heavy honey super, then the top deep, to do a full inspection on the bottom deep—as I had interpreted that to be standard practice—at least once a month. (In actuality, I was over-inspecting my colony due to my inexperience. A skilled beekeeper can read the comb in a hive to determine its health and would need to dive deep into the brood chamber much less frequently.) The bees would buzz, cluster on top of the deep frames, and bubble over the sides of the hive box like lava.


In short, my bees were angry. My leather gloves were covered in stingers. The edges of the hives were full of dead bees crushed between the deeps and supers. My suit was smelly with the stench of nervous sweat. Every time I went to the hives I was scared and worked faster to try to avoid the eruption of bees out of the colony, which only made things worse.

Toward the end of July, I found one of my hives densely packed and sealed tight with propolis, which made it difficult to open. Every time I freed the inner cover, prying it apart with my hive tool, a loud crack would sound, and the sweet smell of bananas would flow out into the air. That banana smell is the alarm pheromone released by the bees’ Koschevnikov gland, which contains isoamyl acetate (the same compound that naturally occurs in bananas). The bees would produce this pheromone upon my arrival and fan it throughout the hive. As I lifted the lid off the hive, the bees buzzed and flew into my veil aggressively, then shot out into the surrounding area, stinging farm visitors, and harassing workers.

For the seasoned beekeepers reading this, it already sounds like a nightmare scenario. But to top it all off, something else had also been occurring that I had not realized would be an issue. About fifteen feet in front of the hive was the farm’s horse-washing station. Every day, several horses would be brought out of the stalls and sprayed down, soaped up, and washed—in the flight path of the forager bees. The animal smell and dust would waft into the hive entrances, further agitating hives already on edge from my nervous management practices.

Close-up of a honeybee perched on a purple flower.

Honeybees are excellent at mapping and remembering where to find nectar. Photo: Lance Cheung, USDA

Honeybees have a great memory when it comes to smells. Their brain is tiny but contains up to one million neurons and is organized into clusters called “lobes.” Each lobe controls distinct functions or activities, and one particularly important lobe is called, the “mushroom body.” This lobe is enlarged in honeybees and takes up to 20% of their brain. Its purpose is to receive sensory information like smell and taste, learn about that information, and remember it for the future. This is what allows the bee’s brain to recall certain flowers that are good nectar sources. Likewise, they can also recall the smells of threats like horses, or a scared beekeeper like me.

As the season progressed, I started to receive calls about honeybees stinging visitors as they got out of their cars. Farm staff could be on the other side of the farm working when all a sudden a stray honeybee would fly in their face, get stuck in their hair, and sting them. My colony had become chronically on-edge, and something needed to be done. First, I tried to re-queen the colony. I bought a gentle, healthy, and highly regarded Carniolan queen from a local queen breeder and put it in the hive. This did change the hive temperament a little bit, but I still had stinging issues and excess defensiveness from the colony. When winter arrived, I decided to move the colony to a new location. It took me years to fully understand all the factors that led to turning this hive—which had initially been calm and peaceful—into the volcano of overflowing guard bees that it became. Here are some key lessons I learned:

Close-up photo of a person holding a metal smoker used in beekeeping.

One common model of smoker used in beekeeping to keep the hives calm. Photo: Eric Fuchs-Stengel

  • Use a smoker. As a new beekeeper you can’t avoid crushing and killing bees and one of the absolute best tools to avoid prevent stress on bees is a smoker. Today, I usually light my smoker with a tiny bit of dry cardboard. Then I pile it up slowly with pine needles and woodchips. I top it off with a layer of wet mugwort weeds, green grassy material, or other green vegetative material growing around the farm. This green layer will cool the smoke as it leaves the smoker, ensuring the smoke is not so hot it would burn the bee wings or spread hot ash into the hive. I use mugwort as my first choice because the bees appear to like the smell.
  • Observe your site. Scope out your potential apiary location before you place hives there. What animals live in the area? What type of weather patterns impact it? Is there a strong wind? Lots of shade? Too much sun? Will weeds impact the hive entrance?
  • Be careful about smells! Wash your bee suit and gloves monthly. Try your best to visit your hives after a shower when your personal pheromones are at a minimum. Try to stay less sweaty when you work your hives by buying a ventilated bee suit and dressing lightly under it.
  • Don’t stress over applying smoke at the beginning. If you want to be “Zen” with your bees, that can happen over time. Master the basics first and then you can experiment with no gloves, no suit, or no smoke.
  • Use equipment that works for you: Thick leather gloves with no dexterity will kill bees if you aren’t careful. If you are feeling brave and comfortable with your hives, try thinner gloves that fit tighter to the hand or nitrile exam gloves (which the bees can sting through) so you can have dexterity without leaving skin exposed.

I hope you can benefit from the mistakes I made as a new beekeeper, so you’ll be able to start your beekeeping career off a little less painfully than I did. Please feel free to reach out to me with questions, or to let me know if there is other beekeeping information you need from us at ATTRA!

Sources:

Paoli, M. and Galizia, G. 2021. Olfactory coding in honeybees, Cell & Tissue Research 383, pp. 35–58.

Conrad, R. 2017. Natural Beekeeping, Revised and Expended ed. From Chapter 2, Working With The Hive / Attitude. Chelsea Green Publishing, White River Junction, VT. pp. 30–31.

ATTRA Resources:

Podcast episode: Beekeeping Basics with Eric Fuchs-Stengel


By Audrey Kolde, NCAT Agriculture Specialist

Growing up, the only cut flowers I ever saw were the ones handed out at dance recitals: a rose from a proud parent or a carnation from the teacher. These classic blossoms—roses, carnations, and chrysanthemums—make up the “big three” of the cut flower world. They’re reliable, hardy, and grown for scale. But over the past two decades, bouquets have evolved into something far more diverse, textural, and beautiful.

The switch to diversity can be traced back to a pivotal moment in U.S. trade policy. In 1991, the Andean Trade Preference Act began opening the door to duty-free flower imports from Colombia. By 2012, the U.S.-Colombia Trade Promotion Agreement made Colombia’s position as the dominant supplier of cut flowers to the American market untouchable. While this surge in low-cost imports made bouquets more affordable and abundant, it also hurt domestic wholesale flower farms, which couldn’t compete on price alone.

Finding a Niche and the Digital Floral Revolution 

Close-up photo of lavender-colored sweet pea blossoms.

Sweet pea blossoms make a fragrant addition to bouquets.

Confronted with this challenge, U.S. flower farmers began to adapt. Instead of pursuing the wholesale giants with resilient, shippable blooms, they embraced their unique strength: growing delicate, fragrant, seasonal flowers that could not withstand long-distance transport. Local farms carved out a niche, offering sweet peas, dahlias, ranunculus, and garden roses—blooms that thrived in nearby soil but couldn’t be shipped in a box.

Social media accelerated this shift: Instagram and Pinterest introduced consumers to lush, wild, and seasonal bouquets. People’s preferences began to shift; they no longer just wanted a dozen roses. Instead, they sought flowers with unique textures, captivating fragrances, and compelling stories. Social media also gave local farmers a direct connection to consumers and florists, allowing them to bypass traditional wholesale channels. This increased visibility on digital platforms transformed previously overlooked flower varieties into sought-after blooms, sparking a grassroots revival of local flower farming.

The Rise of Direct Sales 

The local food movement of the 2010s led to a shift in consumer values towards sustainably grown flowers. Many shoppers began seeking “American Grown” labels, desiring not only beauty but also environmental and ethical accountability. This demand gave rise to more direct marketing, including flower CSA subscriptions and an expanded presence of fresh flowers at farmers’ markets. The COVID-19 pandemic accelerated this trend, when weddings, festivals, and large gatherings were canceled and wholesale orders from florists, event planners, and retailers were scaled back dramatically. What began as a crisis response evolved into a lasting business model as farms transitioned to e-commerce and direct-to-consumer sales, with many farmers quickly adapting by launching online shops, subscription flower boxes, and local delivery services. Small and mid-size flower farms can bypass traditional wholesale channels, strengthening grower-consumer relationships and creating new revenue streams. Direct-to-consumer sales have become a cornerstone of the modern floral industry.

Easy Blooms to Start Growing

Large row of orange zinnias growing on a farm.

Zinnias are an easy flower to start with when adding cut flowers to a specialty-crop operation. Photo: Audrey Kolde

Growing and selling flowers is an easy shift for diversified farms. Summer annuals such as zinnias, sunflowers, cosmos, gomphrena, and celosia thrive in a wide range of climates and are easy to grow and sell. These “cut-and-come-again” flowers can be harvested multiple times throughout the season. For example, a single 100-foot row of zinnias or cosmos can yield 1,000 to 3,000 stems over a season, while gomphrena may produce 3,000–4,000 stems. With just a few rows, you can bring buckets of flowers to market each week. On ¼ to ½ acre, growers often supply local florists, farmers markets, or bouquet subscription services. Adding herbs like basil, mint, or rosemary offers both fragrance and foliage for arrangements.

Adding Value: Bouquets

As your skills grow, bouquet design becomes a natural next step—this is where creativity meets profitability. In busy markets, pre-made bouquets facilitate faster sales. Slower-paced markets allow for a more interactive experience, allowing customers to choose their own stems for a custom bouquet. Either way, refreshing your knowledge of basic bouquet-building techniques increases your product’s value. Learn which flowers function as focal, fillers, line flowers, and greenery, and plan your growing season with color palettes and design in mind. Kraft paper wrapping, flower food packets, and a polished table setup help elevate your market presentation. Flowers naturally lend themselves to visual marketing, so use your social media to showcase blooms in context—on a table, in a vase, or as a gift. Adding a social mission (like donating bouquets to hospital wings, elder homes, or community centers) creates emotional connection and buyer loyalty. You can also build scarcity-driven marketing strategies through limited CSA shares, preorder-only focal bouquets, or subscription deliveries to homes and offices.

Harvesting and Post-Harvest Handling

Mixed bouquets of sunflowers, zinnias, and other blooms on display at a Farmers Market table.

Bouquets for sale at a Farmers Market table. Photo: Nina Prater

To ensure top-quality blooms, proper harvesting and post-harvest care are crucial. Cut flowers early in the morning or late in the evening with sharp, sanitized floral snips to minimize stem damage and maximize water uptake. Immediately place stems in clean buckets filled with cool water and preservative (homemade or commercial). Strip leaves below the waterline to reduce bacteria, and move flowers to a cool, shaded area—or ideally a CoolBot-equipped cooler (34–38°F)—as soon as possible.

Leveling Up Quality

Using cucumber netting or flower support mesh helps produce straighter stems. Low tunnels and caterpillar tunnels protect crops from wind and rain, extending the growing season. Shade cloth can prevent petal burn and help grow longer stems, while row cover (like Reemay) provides light frost protection and speeds up early growth. Insect netting blocks common pests without the use of chemicals, and drip irrigation keeps foliage dry, preventing diseases such as botrytis and powdery mildew. These lightweight, movable tools are well-suited for use on plots ranging from ¼ to 1 acre and make it easy to adapt quickly to changing conditions.

Beautiful Profit

Flower farming isn’t just a source of income—it’s a fulfilling lifestyle that balances creativity and connection to your local community. Lynn Byczynski, author of The Flower Farmer, has inspired growers since 1997 with the message that well-managed flower farms can earn $25,000 to $30,000 per acre through direct sales. Income varies based on marketing, crop choice, and local demand: farmers’ markets may bring in $500–$2,000 per week, while CSA subscriptions often sell for $15–$25 per share per week.

Start Blooming

Engaging in flower farming can be a deeply rewarding endeavor, whether your motivations are a desire for profit, a passion for horticulture, or a combination of both. This vibrant industry offers an opportunity to cultivate stunning blooms while honing your skills in planting, nurturing, and harvesting flowers. As you immerse yourself in the art of flower farming, you’ll discover the intricacies of soil health, seasonal cycles, and sustainable practices that not only enhance your yields but also connect you to the beauty of nature. With each season, you’ll witness the fruits of your labor come to life, fostering a sense of accomplishment and satisfaction that grows alongside your expertise in this blossoming field.

References  

Byczynski, Lynn. The Flower Farmer: An Organic Grower’s Guide to Raising and Selling Cut Flowers. 2nd ed., Chelsea Green Publishing, 2008.

Flower farming is making a comeback as gardeners grow a local niche. 2023. The Produce News.  https://theproducenews.com

DTC flower sales have blossomed during the pandemic. 2021. Bloomberg Second Measure. https://secondmeasure.com  


Related ATTRA Resources:  

Specialty Cup Flower Production and Marketing Publication:

https://attra.ncat.org/publication/specialty-cut-flower-production-and-marketing/

Podcast: A Flower Farm Blossoms:

https://attra.ncat.org/a-flower-farm-blossoms/


Other  Resources: 

Association of Specialty Cut Flower Growers

Growing for Market Magazine: Getting started with Cut Flowers Part 1: The Why and How of it

Kentucky Center for Crop Diversification: Cut Flower Resources

North Carolina State Extension: Cut Flowers